After the Masters I wanted to try something a bit different. I felt my biggest issues in the tournament revolved around the lack of movement and begin able to reach out and threaten objectives. So I decided to go back and try one of the list ideas I had waaay back in October. I decided to try out a 3 drop Legion of Night list. In fact I came close to running this list for the Masters, but decided to go with Skaven instead. After playing the list this weekend I do not think I would have done any worse at the Masters with the Death army than I did with the Skaven.
This past weekends tournament was the first ranked local of the year. I had several options for my army and list to run, however I have really been wanting to try my Legion of Night list. I said I would take it and just try it out. It was all just a test run for me and that would help me make a decision about what I would take at the upcoming local at Montags next week.
The list
“8th Edition Death”
Allegiance: Legion of Night
– Mortal Realm: Shyish
LEADERS
Vampire Lord on Zombie Dragon (440)
– General
– Command Trait : Swift Form
– Vampiric Sword & Shield & Chalice
– Artefact : Ethereal Amulet
– Lore of the Vampires : Amethystine Pinions
Wight King with Baleful Tomb Blade (120)
– Steed
Necromancer (130)
– Artefact : Shard of Night
– Lore of the Deathmages : Overwhelming Dread
UNITS
5 x Black Knights (120)
10 x Grave Guard (140)
– Wight Blades & Crypt Shields
40 x Skeleton Warriors (280)
– Ancient Blades
40 x Skeleton Warriors (280)
– Ancient Blades
40 x Skeleton Warriors (280)
– Ancient Blades
BATTALIONS
Deathmarch (160)
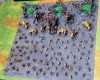
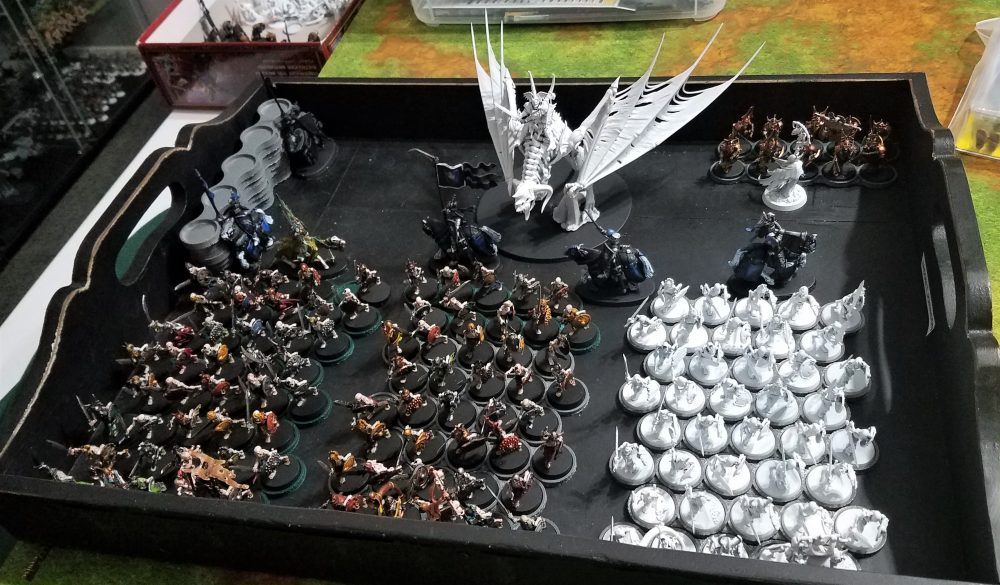
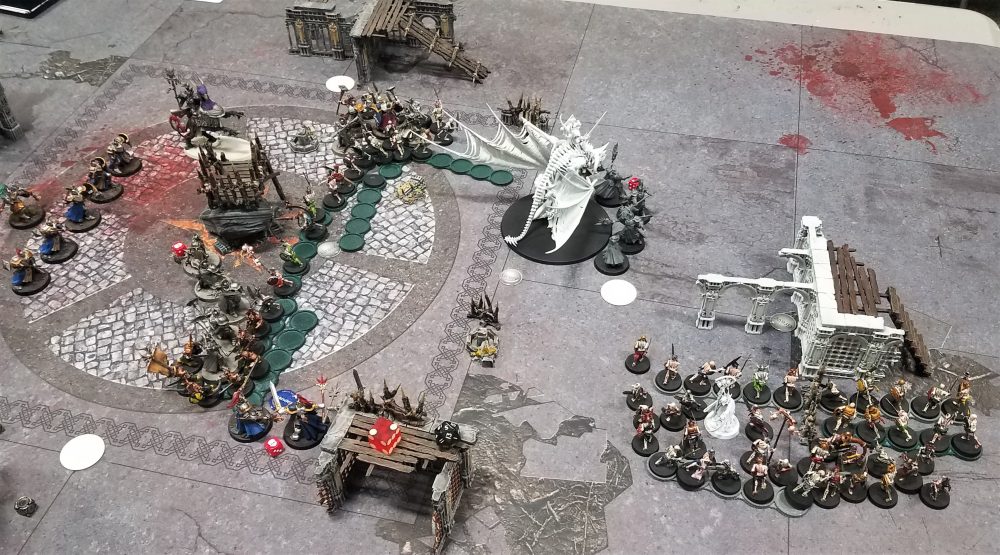
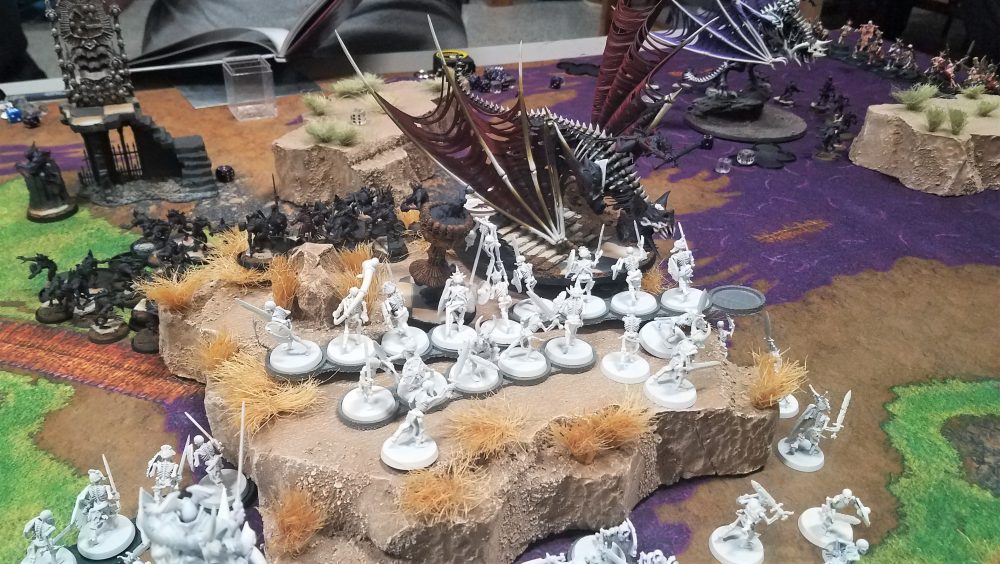
Look all those Bone Boys:
List Design Principles
- Damage output “does the army kill its worth every turn”
- Damage comes from the number of attacks from the Skeletons, to a lesser extent the VoZD
- The damage output is moderate at best.
- Damage comes from the number of attacks from the Skeletons, to a lesser extent the VoZD
- Staying power “how hard is this army to kill”
- The staying power comes in the form 120+ bodies and the ability to heal and bring back whole units.
- Good/above average
- The staying power comes in the form 120+ bodies and the ability to heal and bring back whole units.
- Objective holding “is there enough bodies to hold objects”
- 40 block of Skeletons
- Very good
- 40 block of Skeletons
- Board reach “how much of the board can be reached on a given turn”
- I can outflank 3 units, put units in the gave to be brought in later, the VoZD has a max movement range of 34 inches when running, and a max charge threat of 38 inches.
- Excellent first turn or initial board reach, once everyone is deployed it goes down to good.
- I can outflank 3 units, put units in the gave to be brought in later, the VoZD has a max movement range of 34 inches when running, and a max charge threat of 38 inches.
- Board Coverage/Control, “take up space” “inhibit deep strike, block charge lanes, hold bottlenecks”
- 120 Skeletons can eat up lots of space on the board. If I feel I want to sit back I can block off a large area of the board
- Very good.
- 120 Skeletons can eat up lots of space on the board. If I feel I want to sit back I can block off a large area of the board
The list is named 8th edition death, because the majority of the models were on square bases, that I rebased. Also all the unites were available in WFB 8th edition.
With this list I wanted to be about to do 2 things. 1. Out drop my opponent. This gives me great flexibility on hidden agendas, taking points early, just getting into position. Low drops just feel so important in the meta right now. This is part of the reason to take the Deathmarch. 2. I wanted to be able to threaten all parts of the board turn one and beyond. I can outflank 3 units, bring units up from the grave and also could just deploy regularly and let the Wight King give them a hero phase move. Not only is the movement flexibility great for taking objectives turn 1, but it can force you opponent to hold back because he knows that 40 plus bone boys could pop out on his back line at any time.
The biggest drawback to the list is the damage output. The Skeletons have the number of attacks, but it is more of a slow grind than an alpha strike.
Rolls
Vampire Lord on Zombie Dragon
I built him as a super fast tank with the Amulet, Swift form, and Pinions. He needs to stay alive to bring back units. His roll is to keep the army around and be able to threaten any corner of the board on any turn. You cannot trust that he will kill anything, even though his profile looks like he can be a hammer, he tends to be a bit underwhelming in combat. I found he can take out chaff, and small heroes, but keep him away from tar-pits and big killy monsters.
Wight King on Steed
Battalion tax. He is closer to a tank than beatstick. He has a 2+ save in my territory with a 6++ and 5 wounds. His attacks are meh, but his purpose is to buff the troops. His best roll is to be the throw away Heros that out flanks and brings up 40 skeletons out of the grave at the back of the map. He could also just sit behind a 40 block to give them 6++, His extra attack for a CP is not bad, but it is situational, in my mind, because I would rather save the CP for battleshock and bringing back units.
Necromancer
He is there for an extra spell, and to give me the ability to cast Vanhels. I gave him the Shard of Night to make him -1 to hit in shooting, so if he is next to a unit he would be -2 to hit. He is there to buff and bring back units. I also took Overwhelming Dead on him because I think it is a great De buff spell.
Black Knights
Outflank objective grabbing, harassment unit. 5 black nights are nothing great, they are there as a outflank threat, or can be left in the backfield to hold an objective. They have good movement and the damage output on the charge is ok. Could also be used to screen.
Grave Guard
Can be used as a screen or to hold back line. Not bad as a unit to hold the rear, they have a 3+ in my territory and there damage output is solid for 10 model unit. So they do ok away from the main body.
Skeleton Warriors
The main meat of the army. They are the real threat. They hold all the objectives and do all the damage. I can bring them back, they outflank, rise from the grave and block off the board. They can do a good bit of damage to equivalent units, the bigger monster they just tend to swamp and hold.
Deathmarch Battalion
This is battalion is taken to lower the drops of the army. Its abilities are ok, the Hero phase move is good, but not great, the extra model back is not bad, especially on the Black Knights. I would say it is slightly over coasted, however I am getting an artifact and CP for it. I am willing to pay the extra points to reduce my drops.
All in all this is just a concept. Just me messing around and seeing if I can strike gold. If I learned to play this list correctly I think it has legs.
The Tournament
This was the first local tournament of the 2020 Masters season and it sold out at 20 players in only a few days. At the tournament many of the Dallas crew made their way down to roll dice and get an early jump on collecting Masters points. The Tournament also featured several of the Houston AOS standouts. There were a few newer player in attendance also. So it was a good mix of list and player skill levels.
I will say that I was a little off with my record keeping this event. Not to make excuses about my play, but I was under the weather all week and did not sleep much the last few nights. I had also fell down the stares at my house the night before so on top of all the fatigue my body was aching from the fall. I think this really showed itself in my last game, after all my Mountain Dew had worn off!
Game 1
Mission: Battle for the Pass
Secondary/Hidden Agenda: Center Ground
Tertiary: Score 6 or more points in a turn.
Opponent: Travis F
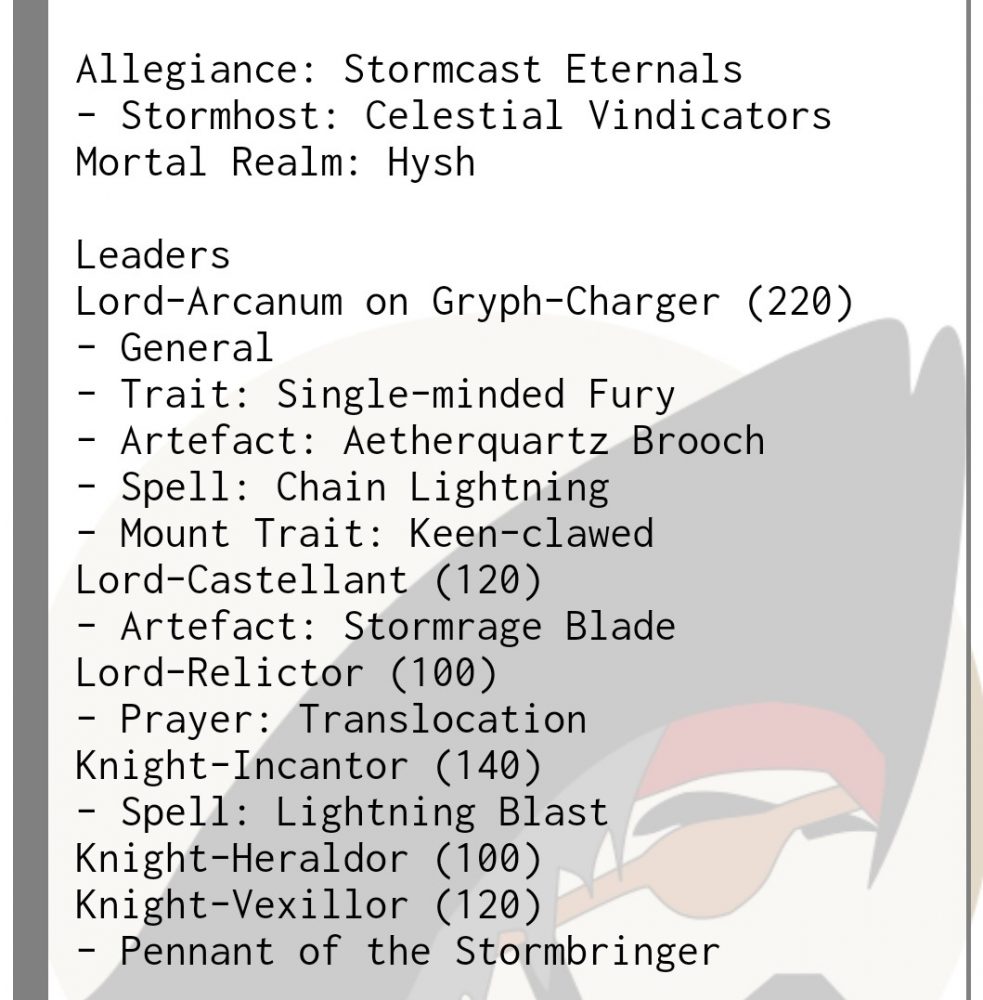
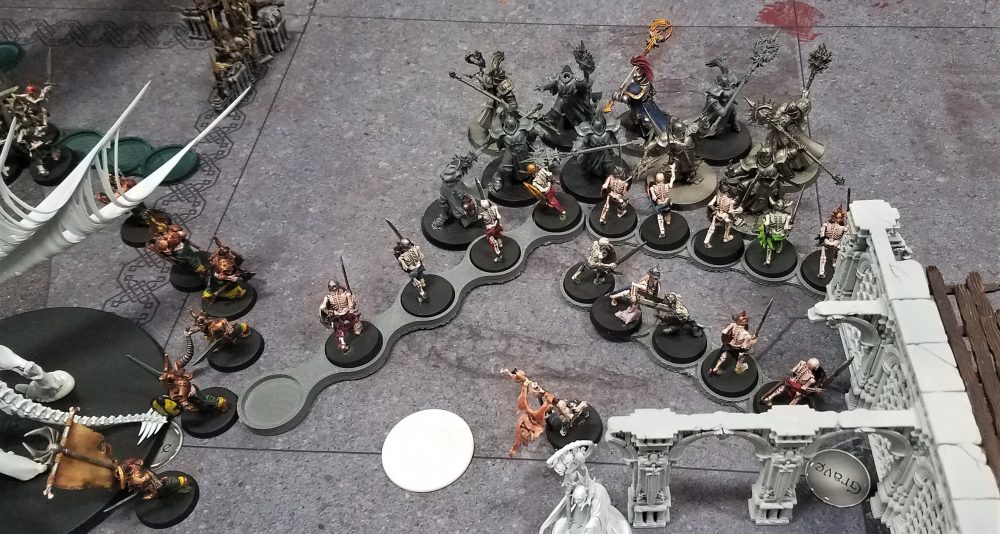
Opponents list breakdown:
He has lots of ways to move around the board, So I would have to keep bubble wrap up most of the game. The biggest threat is 10 Evocators. All in all a standard Stormcast list. From a list point of view I felt it was not a horrible match-up, and that I would be able to grind him down eventually.
Pre-Game:
I chose center ground because It seemed like a good bet I could hold at least 1 of the 2 middle objectives.
This was Travis’s first tournament and he was relatively new to the game. So we took a long time talking out the game and going over my list. This was great because I am all about helping new people have a positive experience.
I and played around with this mission and knew that I could out drop him and take both center points turn 1.
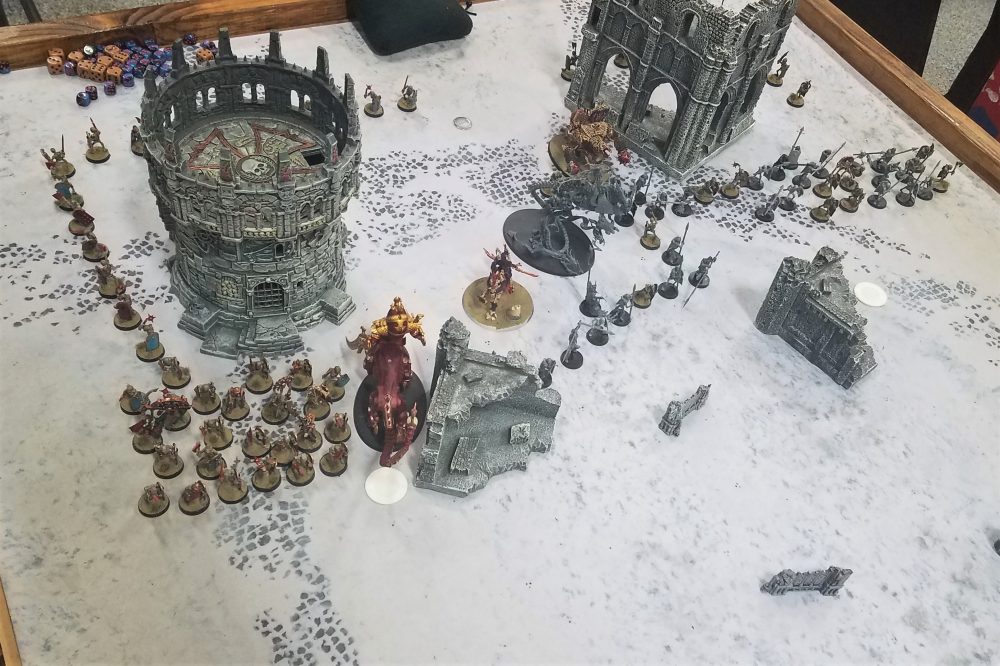
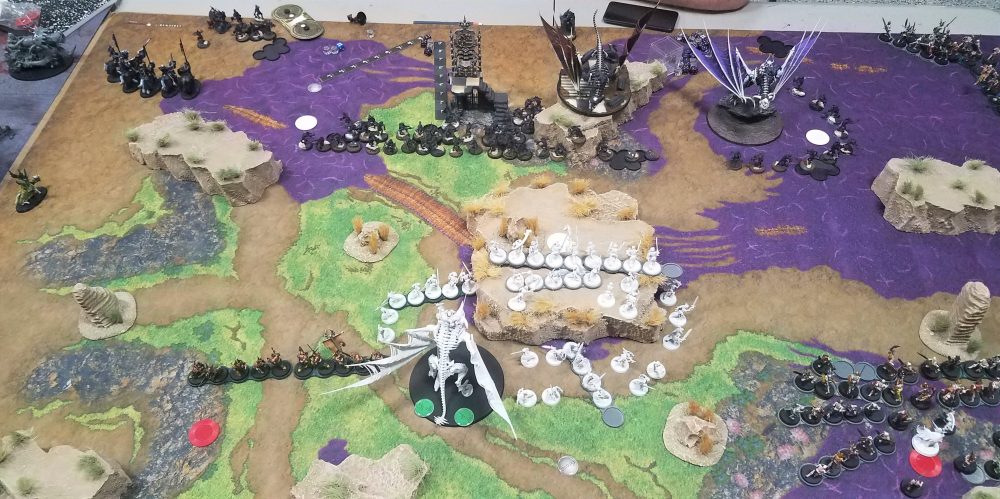
Deployment:
I put 2 Graves at the top of my deployment zone. 1 grave almost center of the board. 1 grave very close to his 4 point OBJ.
I deployed my VoZD, Necro, and 40SW in my zone.
In the grave I had 40sw, and Grave G. Outflank I had the BK, WK, and 40SW.
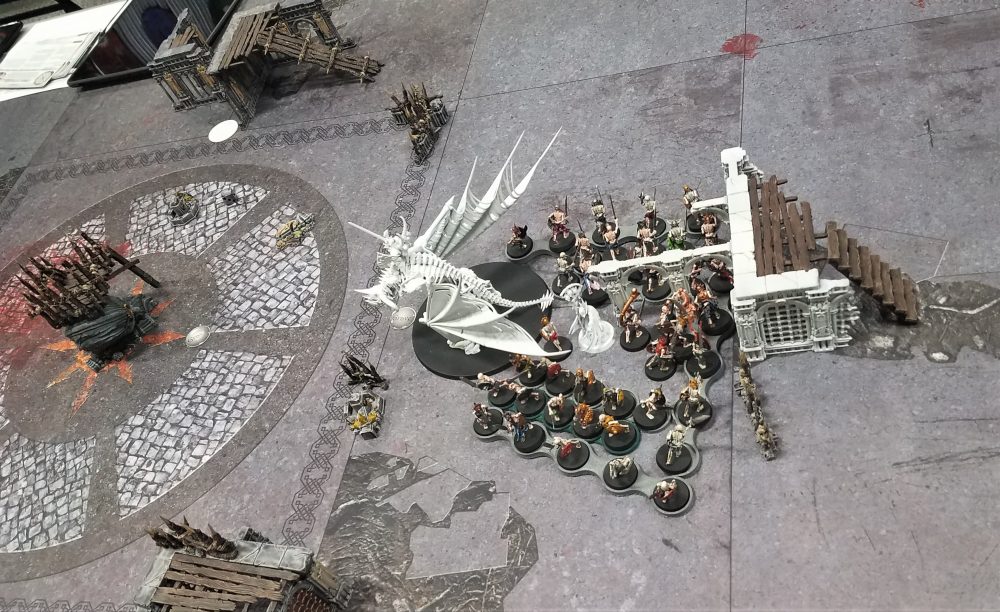
Travis put his heroes on the the board, a unit of 5 Sequitors and the 10 Evocators. The rest he had in the sky.
Turn 1
I took first turn, moved my VoZD into position to bring up 40SW from the center grave. They took both center OBJs and provided bubble wrapping for my Dragon. I also brought the GG out of the grave to give a little more screening to my VoZD just in case he got a good deep strike and charge.
I did not bring the outflanks in this turn, I was waiting on him to move more units out of his deployment zone. I planned to bring them in next turn. “this was my biggest mistake of the game”.
I scored 5
Mysterious symbol?
Travis was able to do a few wounds to my lead unit of SW, and buff a few of his units.
He the moved all his unit up towards the center, he dropped in his remaining units from deep strike, and he used his once a game ability to deep strike his 10 unit Evocators to the back right of the board.
He failed the charge with his Evocators, and then decided to not charge with the rest. However, he was in position to take both center points.
He scored 5.
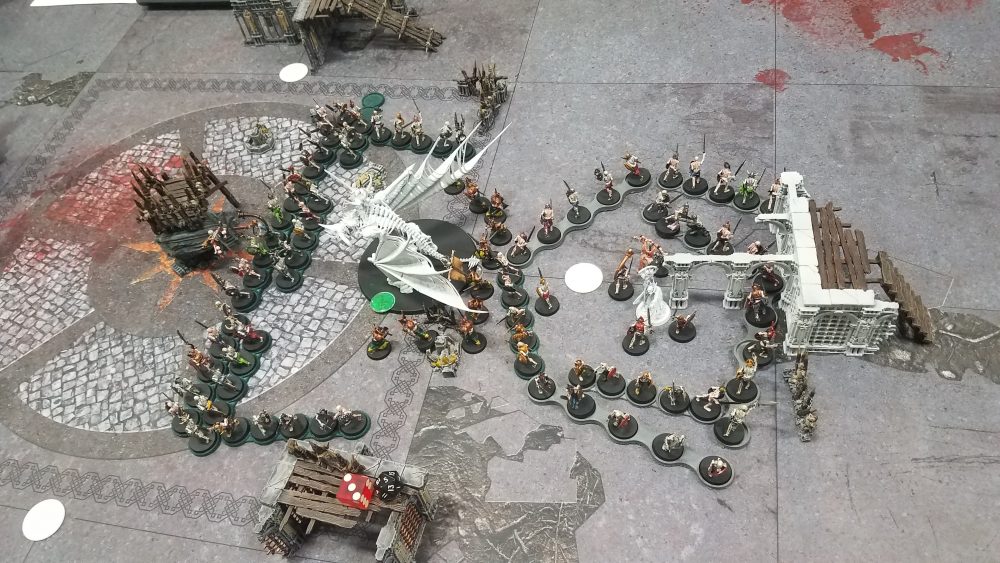
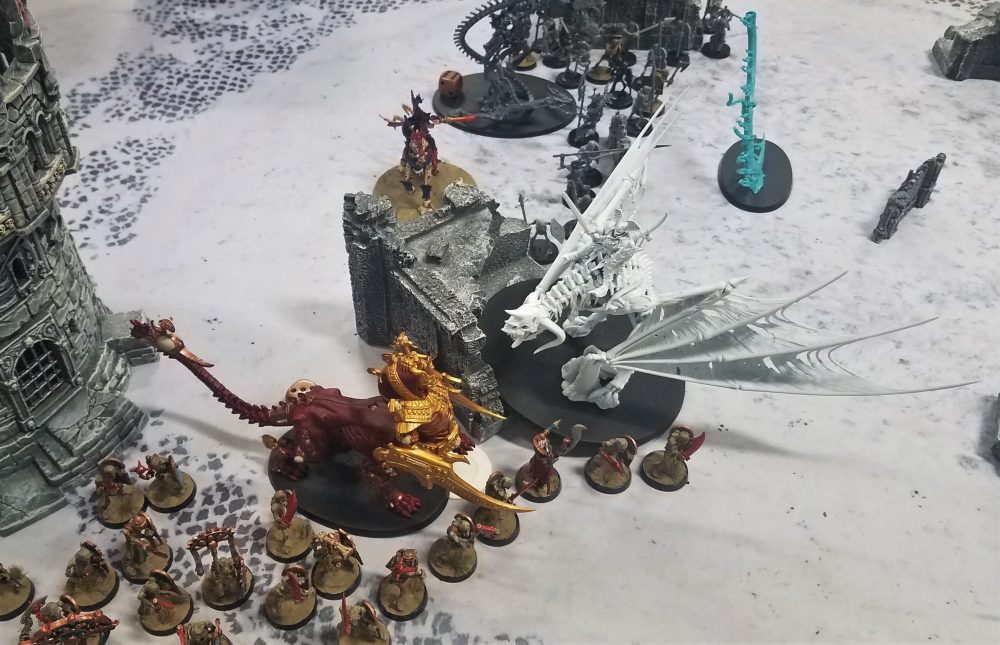
Surrounded:

Turn 2
He won the roll, and took the turn. This was going to hurt, but I would be I was in a ok position to weather the storm.
Travis was able to do a few mortal wounds with this magic. He then moved everything up into charge position. He charged in and just about took out the back unit of SW. The front unit fared ok, I was able to strategically remove models. At the end of the turn I used a PC to keep the front unit alive and let the back unit die from Battleshock so I could bring them back full next turn. “I should have kept a better look at the time. If I would have realized that this would be the final turn I could have just kept them around so my VoZD could have made a move to take center points.”
All in all an ok turn, but he scored 5 points.
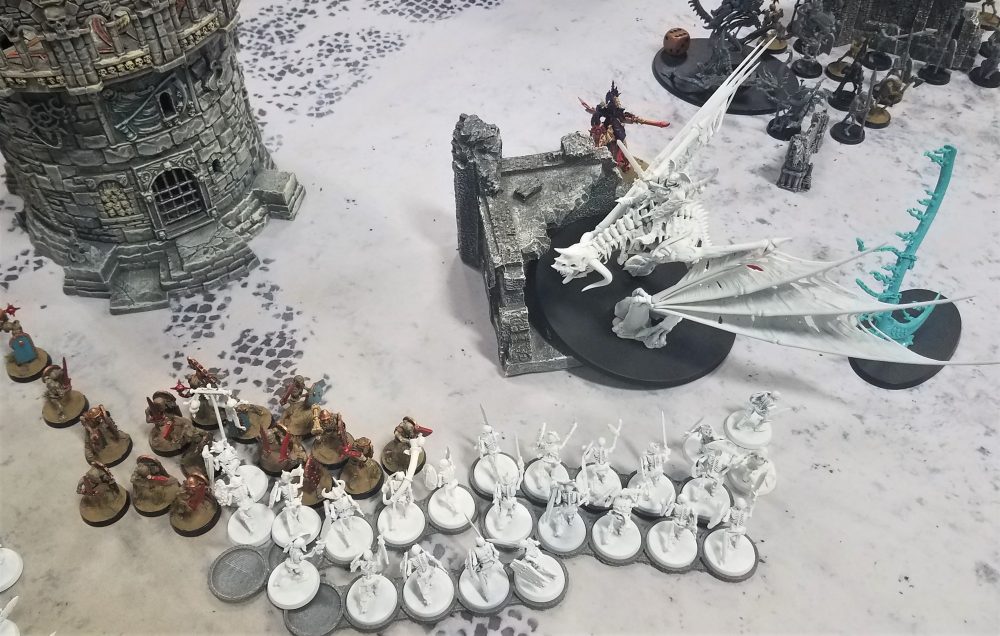
Not many Skeletons left:
My turn I healed my units, failed my castings that was about it.
I moved around my units to try and take back the center point. I also brought in my BK from the south, WK and 40SW from his back board edge. I also used a CP to bring back the destroyed 40SW in the back.
I need some big charge rolls to make any headway. It was also around this time, when Andrew came around and told everyone 8 minutes reaming. I had messed up bad with the time management. The 40SW on his back edge would need another turn to get to the point unless the made a 12 inch charge. The BK needed a 9 in charge the returning unit of 40SW needed a 9 inch charge to get to his Evocators. in the end I charged the Evocators with my VoZD failed with the 40SW. The unit on the back line Failed the 12 inch charged I rerolled and it was short also. The GG made a good charge and was in position to take the South center point. The black Knights made a good charged.
I killed several of the Evocators with the VoZD but left 4 alive and they ended up taking him down to 2 wounds. He then killed the BK, and I was able to do a few wounds to the rest of his engaged units. I ended up being 1 model short to take the North center . It was a big fail on my part and I ended the turn make 3 points. I did complete my Hidden agenda.
Time was up and I needed 1 more turn to try and win. We rolled off just to see what would happen and I lost anyway, so that would mean my Dragon would die next combat phase. It was a solid game and I learned much about how the army was going to run.
Final score was 8 to 10. If I would have managed to take both OBJs I think he would have won the minor on kill points, seeing as how I had not even killed on of his units, and he killed the 40 block.
What is looked like at the end of 2:
AAR
The loss was my fault for playing slowly, I wanted to take time my my opponent and make sure he knew all that was going on. Also I was playing slower than usual because this was my first time playing a death list in 8 months or so. Only getting to turn 2 really hurt, I needed another turn to get to his back OBJ. In hind sight I should have just outflanked my 40SW in his backfield turn 1 and let him deal with that for a turn. At least that would have made him commit his army to killing that instead of taking the points. It is also possible that I could have place to graves in the center of the board and had 2 units of SW pop out first turn, It would have made it extremely difficult for him to take the middle. However my back line would have been exposed.
This was a good learning game for me, the big takeaway is that I need to be overly aggressive or overly defensive. Pick one and go all in.
Game 2
Mission: Scorched Earth.
Secondary/Hidden Agenda: Ancient Heirlooms
Tertiary: Burn more in a turn than your opponent does.
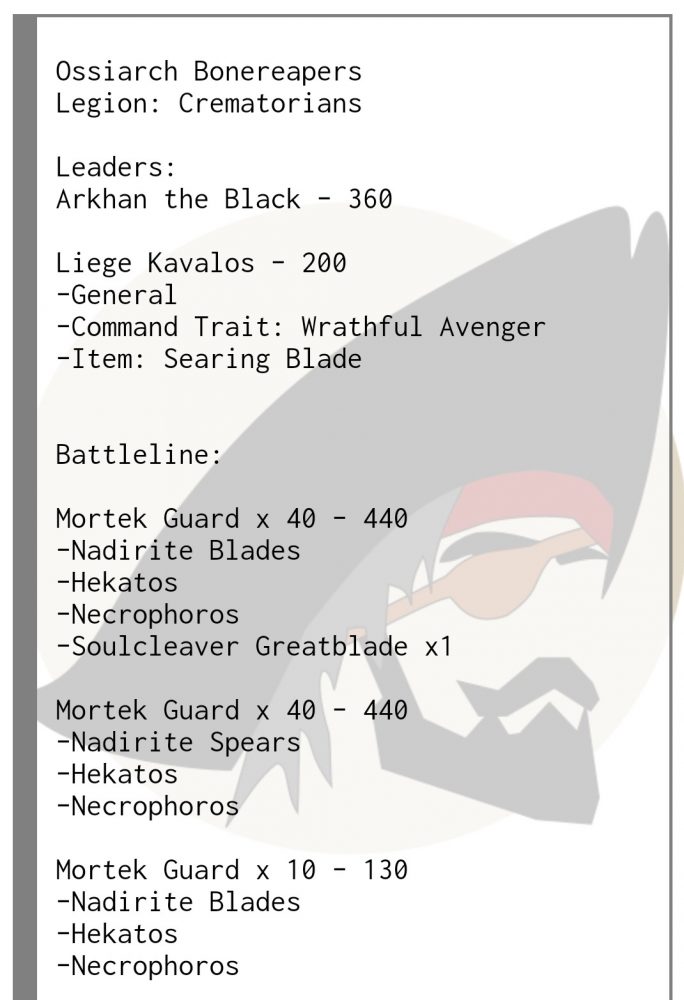
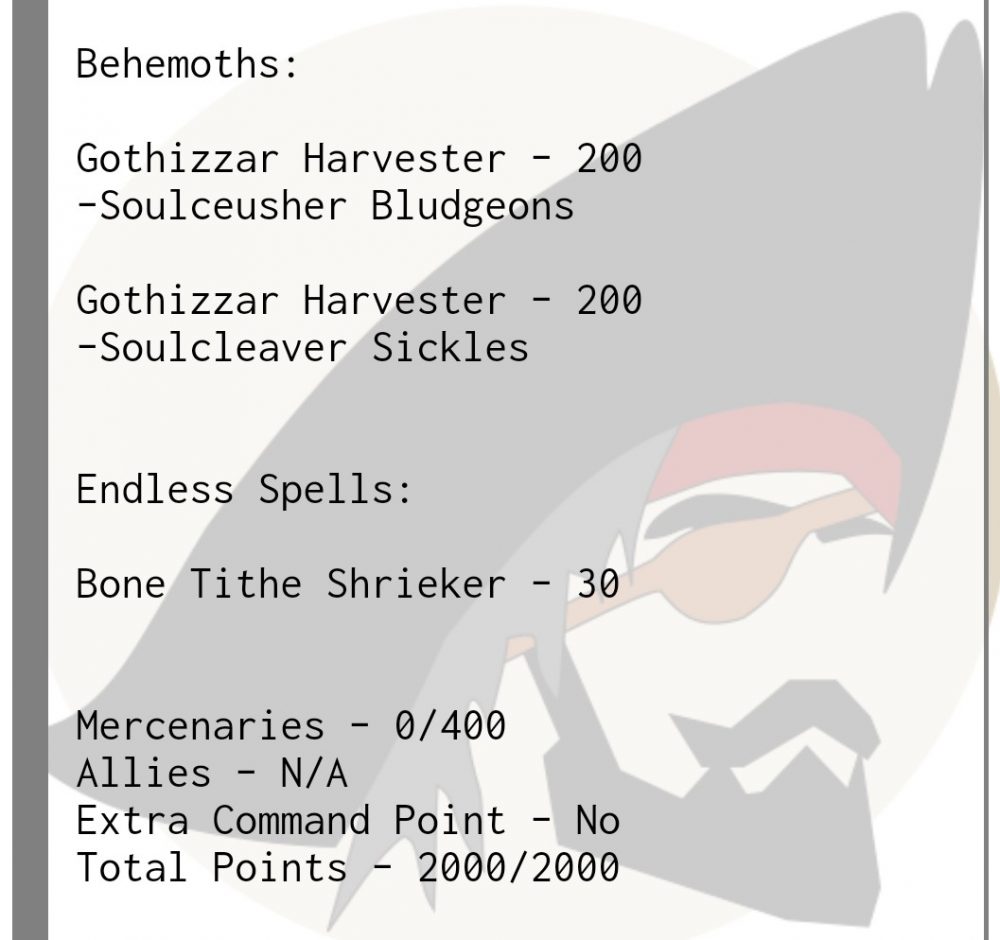
Opponent: Dillon C
Opponents list breakdown:
Well last tournament I got to play Dillon and his Petrafex with Nagash. This time he is bringing Crematorians. Hands down bottom line is I need to kill his Harvesters. I cannot have him bringing models back and then blowing them up again. Other than that stay away and use my outflank to keep in him place.
Pre-Game:
Dillon is a fun guy to play against, he is easy going and me and him have about the same level of ability. He would be able to smash through my ranks so I needed to keep myself back and be defensive. I would also need to keep 1/3 of the army in outflank to keep him from rushing me turn 1.
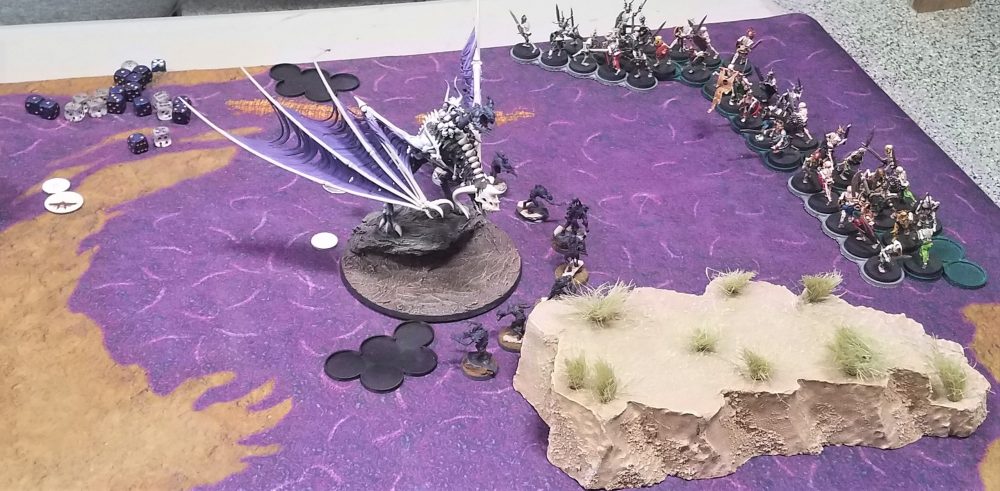
Deployment:
I sat up graves in the north, south east and west. One thing that is challenging about this list is that I am out deploying my opponent most of the time, so I am not going to know where they are putting down their units. I tended to spread my graves out all tournament to give me lots of options.
On the board I put my VoZD center, 2 x40SW, Necro, and GG . Outflank I has BK, WK. grave I had 40sw.
He spread out evenly and blocked as much of the board as he could. He only had 3 units to control his zone so that worked in my favor I would have to pick a side and pressure it.
Turn 1
I gave him first turn. He shuffle up but did not move forward. He collected 4 points.
My turn I shuffled back and collected 4 points.
Turn 1 took less that 5 minutes.
Turn 2
See turn 1
Turn 3
I got the roll and gave him the turn. He shuffled up again.
On my turn I decided I need to strike, if not this may end in a draw. The big deciding factor on this was casting Penions on my VoZD. It gave him the movement I needed.
I moved up and raised 40SW from the south grave. I shot with the dragons breath and did nothing. I made the charge with my dragon but failed with my 40SW. I was able to lock both his units of guard in combat. However after crap rolling by me and good saves by Dillon the Harvester was still alive. The terrain was also a hindrance, because it did not let me pile in.
I scored 4.
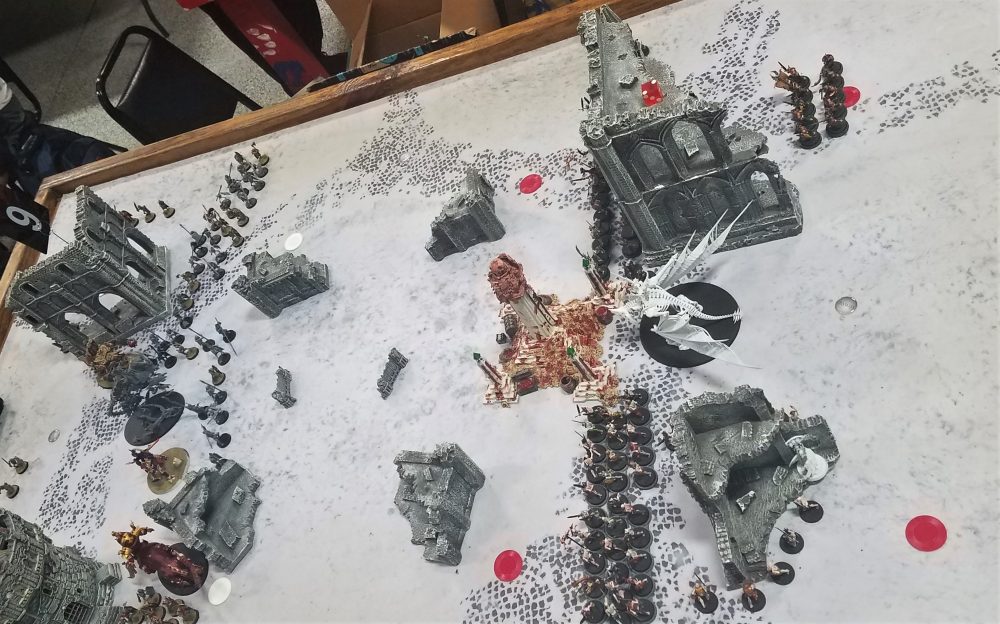
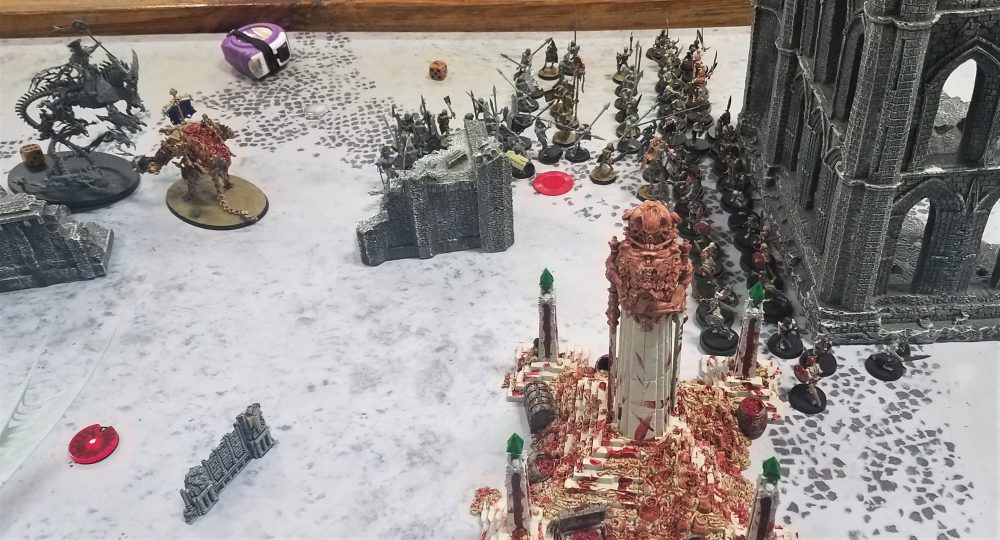
The total was 12/12
Hello, Necrosph…er Harvester:
Turn 4
I won the roll, I think I would have been ok if I had not because I had him locked down, so he would have needed to do a bunch o wounds with spells to free himself up. Glad we did not have to find out.
All my casting failed, I spent a CP on Dread Knight to let my 40SW re roll hits.
I was able to kill the Harvester in shooting. I moved in my 40SW and made the charge against his Guard. I activated with my 40SW first because I was locked in with my Dragon on the other unit. The 40SW took out a good 15 guard in their first swing. “thank goodness he was not able to bring them back!”. He had to make a hard choice of to pull from the front on the point he controlled or pull from the back and leave that point open to my BK. He pulled from the front thinking that his return swings would even the field. He rolled very very poorly on his attacks with the guard, I made a few saves and was able to take the point. I activated with my VoZD, I pilled in and was barly able to pull in his Kavalos. I could hit him with the bite but the rest would have to go into the Guard, I did not want to put any attacks into the guard. If I killed 2 he would be freed from combat and could move next turn. This was not optimum, because he could then threaten my North OBJ.
I was able to take is OBJ and burn it for 3 points. I scored a total of 7 this turn.
Were did he go?
His turn he moved up the board to try and make a long charge against my north skeletons. I denied his Curse of Years.
He made an 8 inch charge against my 40SW on the North. however because of the way he was spread out he was not able to get many in combat. I was able to weather the storm and only lost a few models. However he pulled enough to take the point. He burned it for 2. On the other side the Dragon was able to take out is Kavalos and would be free to do whatever next turn.
The score was now 19/18
Turn 4
He won the roll. Our time for the game was about up. So we had a big discussion on what was going to happen turn 5. In the end his only chance of victory was to let me go first and try to push through the Skeletons or let Arkhan take damage and teleport to one of my back points. He let me take the first turn.
I honestly dont know what I was thinking. I could have just shuffled stuff around and won the game with no sweat. However I was like F it I have already lost one game, so no first place for me. I am here to have fun, lets go kill Arkhan and try and get the tertiary objective of burning more in a turn. HAHA.
I brought it the WK to support the engaged SW and then I brought in the BK to try and charge Arkhan. I moved the Dragon up and made the 3 inch charge. the BK failed the charge. So here it comes the big swings with the VoZD…..1 total wound! He teleported away. The rest of the combat we did not even bother with it would not matter. Epic fail!
In his turn Arkhan was not able to kill enough of the GG in my turn to take the point. Is was an epic fail, by both our big heroes.
Final score for the game was 22 to 21.
AAR
I think we were both overly cautious, just waiting for the other person to make the first move. The biggest misplay that I had was thinking that he could not get into charge range with his Guard. I should have moved back or ran forward to block him out of the 6 inch bubble. It may have been a good idea to just lock him in place around turn 4. At the end I did silly stuff, just trying to have some fun. Luckly it worked out for me in the end, but tactically it was the wrong move. It would have been better to just sit tight or try and take out his back North OBJ. But in the end It all worked out. Dillon is a fun guy to play against.
I will say that after having played against Bonereapers many times now and seeing what they are doing at the tournaments I am not sure that I would want to play with them in a tournament. I worry about getting locked down and the lack of board control. They are obviously a good army, I just dont know if I would be able to run them correctly.
Game 3
Mission: Focal Points
Secondary/Hidden Agenda: Overrun
Tertiary: hold the center at the end of the game
Opponent: Marcus M
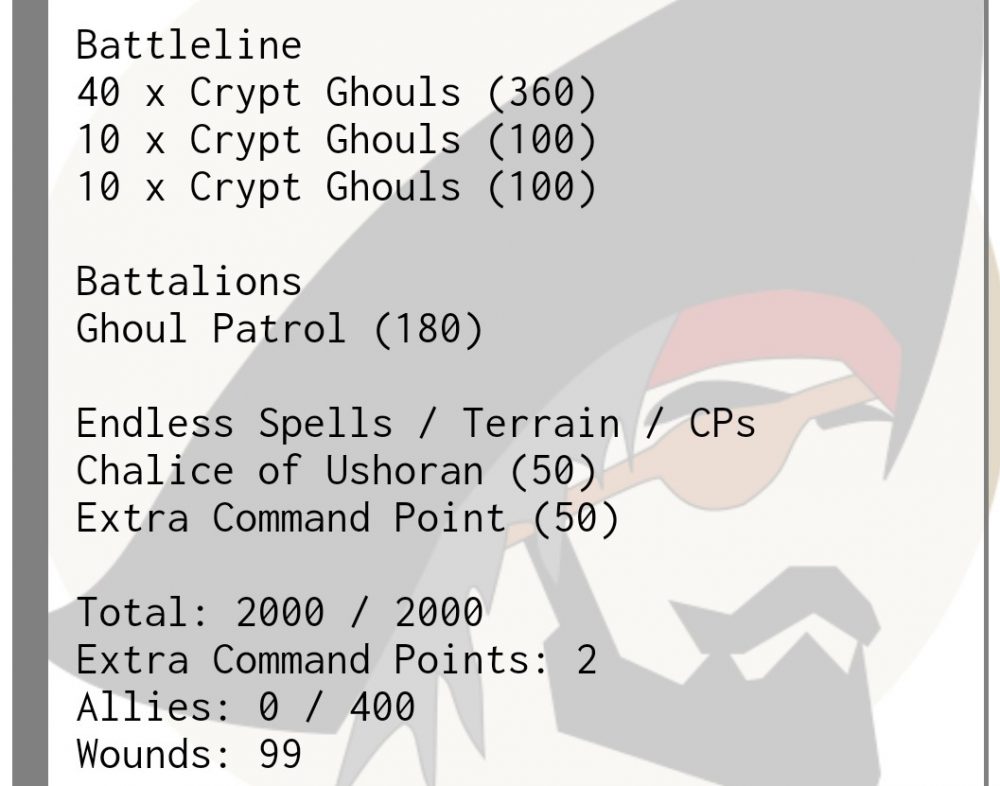
Opponents list breakdown:
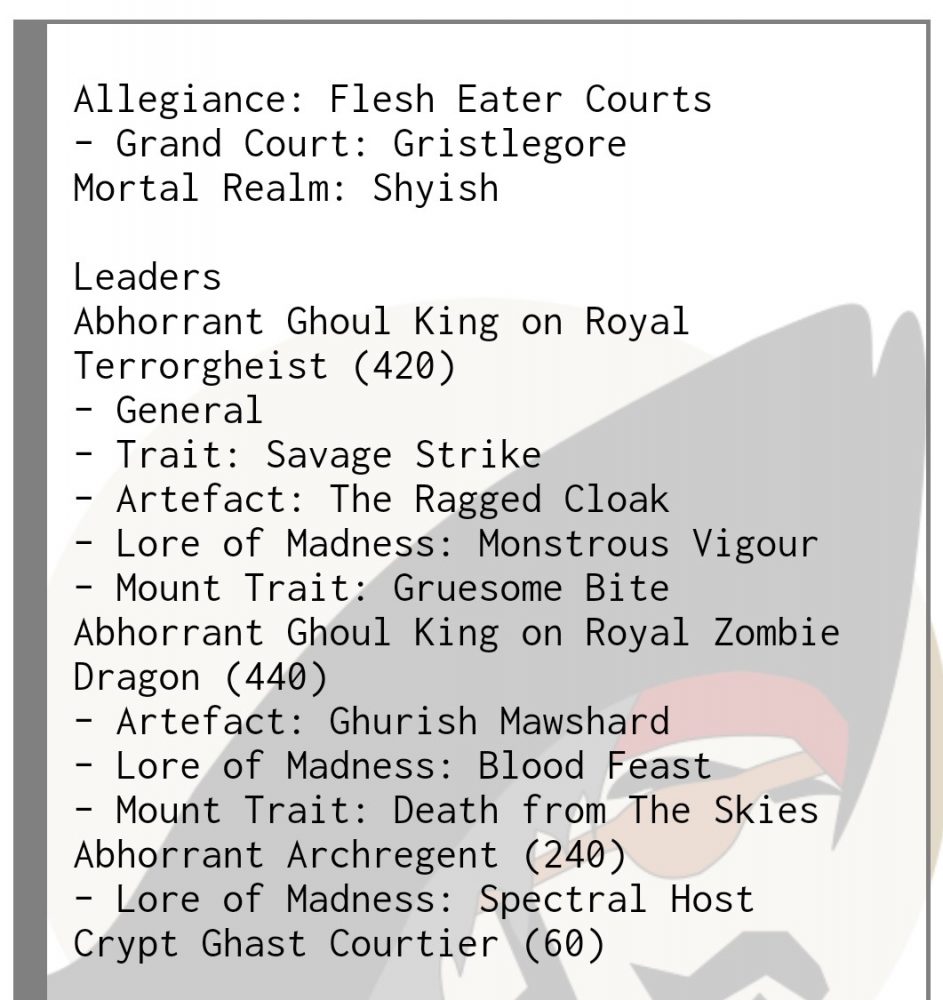
This list is a good bit different from the last time I played Marcus. However I think I would have rather faced the Blisterskin list. My Skaven list would have done a bit better against this than the Blisterskin, c’est la vie.
The biggest worry in this list is getting my VoZD tied up with his Terrorgheist. The mortal wounds would end me. He also has Ghoul Patrol, but I will be out dropping him, so it will be interesting how he plays it.
Pre-Game:
It was nice to play Marcus again so soon after out last match up. I was hopping to get a win against him I would not be down 0/2 against him all time. He is a nice guy and knows how to run his army, so it was going to be a tough game any way you sliced it.
I was going to have choice of first turn. So I decided I would go first and just be aggressive and send some unit at him that he will have to deal with. I also decided that I would go ahead and complete overrun first turn. The one thing that is super awesome about this list is that I have so many deployment options and I can pick and choose various hidden agendas to almost autocomplete.
As a side note we had played to time the last game, so I was rushing over to get ready to start this one. Luckily I have a good idea of FEC, because I would not get much time to analyze his list.
Deployment:
I placed 2 graves on the center line of the board.the other 2 were on the edges close to his points. Once again I and doing this blind so I am not sure how I want to deploy my units. By placing the graves in the back it gives me more options and it puts pressure on my opponent to account for them during his deployment.
On the board: Necro w/ 40SW, VoZD center field, GG on the L.
In the grave: 40SW. Outflank: WK, 40SW, BK
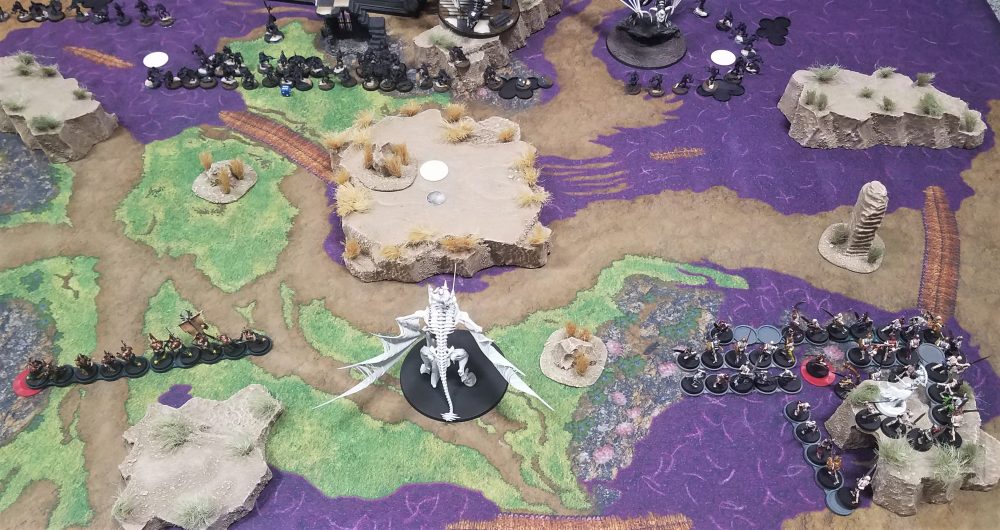
Because of his low unit count Marcus made the decision to deploy his Ghoul Patrol on the board. He was stacked with a strong center. His weak flank was on the L, but he had more room for me to deploy on the R.
Turn 1
I took first turn. I cast Mystic Shield on my Vampire. I then Shuffled him up and brought 40SW out of the center grave on the middle OBJ. I outflanked with 40SW on the right, BK and WK on the L.
I charged and failed my charge on the R, but made a good charge on the L with my BK.
I was able to kill 9 Ghouls on with the Knights, and the last one ran from battleshock. “thank goodness, last time I did this exact thing to him and he rolled a one!”
at the end of one I scored 4 points and completed Overrun.
Looking ok so far:
His turn he cast most of his buff spells on the Terrorgheist, and he cast the Chalice.
He moved up with everything in the center. He re positioned the R flank to make sure he could hold the point if I got next turn. He charged the 40SW in the center with his TerrorG, however he did not charge with his Ghouls.
He swung and killed a good bit of my Skelletons, but the had a 4+/6++ so a good bit of them lived. When it was my turn to pile in and attack, I made a questionable move. I was able to pile in and pull his Ghouls into combat, I was not trying to do any wounds I just wanted to lock him into combat. He was not in a good position to do many wounds to me, so I thought it was a safe bet. All in all this was not a bad idea, the problem was then when I pulled him he was able to get more models within 6 of the OBJ and it probably gave his control from me doing that. It was 100% a miscalculation from me. “I will say that I played a poor game. I 100% believe I was mentally out of it this game. I think my lack of rest and general body fatigue was setting in hard. I would continue to make poor decisions as the game progressed.”
He scored 4 points
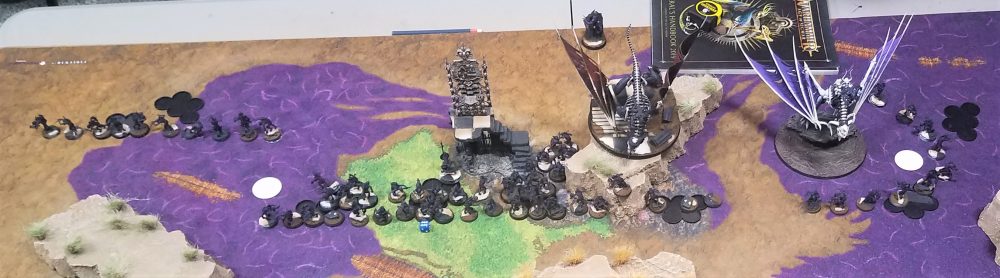
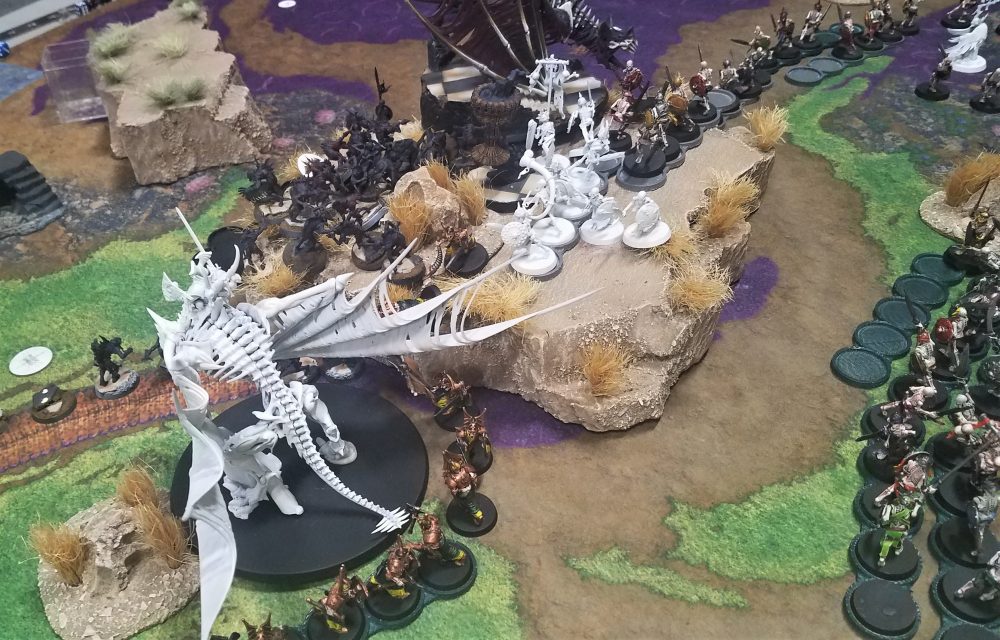
Scrum in the center!:
Turn 2
He won the roll and took the turn. I was not absolutely devastated by this because I was in a good spot to tie him down and I would have the possibility for a late game double.
He got a few of his buff spells off and put them on the Ghouls. On the R side he closed in on my 40SW to prepare to charge. He also used his Ghoul King to summon 3 Flayers.
The Skeletons on the R got hit hard by the Dragon, I was able to pull a good bit out of combat so the Ghouls could not do any damage, however I was planning on them dying to battleshock anyway.
The center not much happened, he whiffed on lots of his rolls from the TerrorG and the Ghouls did some wounds, but at the end of combat I still had about 10 Warriors renaming. On the L he made the charge with his Flayers and they took out 5 Knights.
He Scored 4
About to say Bye Bye:
I failed all my castings. If I would have gotten Pinions off I would have had some very good options. But I did not. So I was sort of like WTF do I do. My primary thought was to bring back the 40SW that he just deleted on the right. This was an OK idea, however I should have moved into position to take out his King on the L and take the point. If then I could hope for the double and summon the back in that corner. I would have easily scored 4 still been in the game. However I made my biggest mistake of the game. I did not dispel the Chalice. I had told myself that was the #1 thing the Necro needed to do and I straight up forgot. Then to compound that I decided to leave my VoZD within 9 of my back grave so I could bring out the 40SW. ok cool, just try for the double not the worst idea ever. However I said well I should just charge the Ghouls and try to kill enough to get that center point back. The Right unit of SW made a good charge and added a few bodies to the center. The Dragon made a charge into the Ghouls, and the GG also charged. The VoZD just killed very very few Ghouls, and the rest of my units did not do any better. It was a utter failure of a combat, however I only lost the point by about 2 models, so it almost worked. But because of this I only scored 2 points, I was going to be 2 far behind the count to make it back up.
Oh as a side note the Black Knights died and the WK did like 1 wound to the Flayers. Soooo, yeah downhill.
I scored 2 and needed the turn.
Seemed like a good idea at the time:
Turn 3
I needed the turn to fix my mistakes. He rolled a 1!!!, then so did I. he took the turn.
He did not do a bunch of damage this turn, but enough for him to hold the center and then the used his Flayers to fly over and take my Back L OBJ. He scored 6 and with the small amount of time renaming I would have to take all 5 points to tie, and to make things worse I had to killed any of his units yet so he would win any tie breakers.
Because I had made the mistake of locking my Vampire in combat He would not be able to go kill anything. I was a loss.
I called the game, the final score was 8/14.
AAR
After the game Marcus commented that it was close and he never felt assured of the win. I agree, however my miss management sunk me. Marcus also made a good point that in turn 2 I did have the ability with my last BK on the L to run out of combat and if my WK could make a long run they could possibly take his L point. I measured it and dont think the WK could have made it, however if I would have just flown my VoZD over then the I would have auto taken it without even fighting. So another small miscalculation by me. I was just not sharp during the game, I had the opportunity, but I let myself down. All in all a good learning game.
I am seeing more and more that big monsters can just be locked down by hoards. I have to start thinking of using my tar pits and tar pits, I just keep expecting them to die to big monsters and the were more survivable than I had thought they would be.
List Performance:
I was happy with the tactical flexibility that the list showed. I did not face any shooting armies, so I do not know how I would have handled them. This was my first 3 games with the list, but I feel I had a chance to win each one. Unlike my Skaven were the mission/opponent could just be an auto loss. I am not sure this list as the damage output to win any GTs, but it is super flexible and I like that.
Vampire Lord on Zombie Dragon
Very hard to kill in Close Combat, but susceptible to mortal wounds. He is build to be a flying tank and he does that nicely. Do not at any time think he is going to go in and kill anything. Like many of the monsters in the game he is super swingie.
Wight King
like a mini version of the VoZD. He is a bit of a rock with a 3+/6++ and 5 wounds that can go up to a 2+ in my territory. However he is killing nothing…like nothing. Just keep him back and use him to buff or outflank and bring things out of the grave.
Necromancer
I build him to survive and he did, in fact he never even took a wound the entire game. He did not do much of anything, but he lived.
Black Knights
Nice addition, but in 5 man units they are not killing much. More of an OBJ grabbing threat. The did a good job in game 3 when the got the charge, however the are just not tanky enough at a 5 model unit to do much of anything.
Grave Guard
3+/6++ they are hard as a rock and hit hard also. I want to really bring this unit up to 20 models and use them in a more of a damage dealing roll, however I have to drop a bunch of Skeletons to do that. They are worth the inclusion.
Skeleton Warriors
They do what they do. 40 wounds that moves slow and can come back. Some opponents cant deal with them, other will just mow through them. They are a solid choice to build around, but man there were some points in the tournament that I wish they were Chainrasps instead.
Looking ahead
I have another local tournament in a few days. I was very on the fence about this list and running it at all. I had told myself this was test run for the list and if it did really well I would run it some more. It did ok at the tournament, but most of the fault rested on my shoulders. With that said I am going to give it another try this weekend and see how it does. I think I have learned to play with it a bit better and with some good match-ups I could win a few games.
I have played around with taking out the VoZD and just running a Vampire on steed, using the extra points to buff up the BK or GG. undecided on that, but it is an option.
I have also signed up for Smash and Bash in Austin and Lone Star in Dallas. IDK what the F I am doing for ether. I had been looking at FireSlayers with some KO allies, but my goodness that is an expensive army. Well maybe I will get a big tax return and just bite the bullet. Hay I may get a GT in with them before they get killed in the GRB2020, HAHA…crying on the inside.
So my questions to you:
- Do you like the list? How viable is it at a GT?
- Would you tweak the list? What changes would you make?
- What army should I be looking to run for the Dallas GT? Fireslayers with KO allies? Tzeentch? Back to my Skaven?
Y’all be good.