I made it out to Atomic Hobby Shop for the first tournament of 2020. There were a total of 8 players, 4 of us had Masters invites, and the other 4 were veteran players. This made for an awesome event. This was the first tournament that Andrew has ran to my knowledge. He did a good job of keeping everything running smoothly. I don’t think that there was any issues with rulings and or the general organization of the tournament. So looking forward to being out at Atomic for more tournaments this year.
Going 1 and 2 was not optimal but I learned a good bit from the event.
My list and Pre-Tournament Thoughts
I ran my Masters list, it is the same one I have been using for a few weeks now. I have not done all that great with it winning about 33% of my games. I think it has potential, but much of it has to do with me and deployment. I think that deployment is probably the one thing that I need to get better with. This list requires a good bit of synergy so deploying everything in the correct position is important. . In the list previously I build my main strike force around 80 Plague monks supported by the Furnace. They were my center and had the bodies and damage potential to hold the center. Now that I have only 40 Monks and their damage potential is down, I think I need to start using them more as a flank and bring my Stormfiends into the center of the board. Before the Monk Update I used the Stormfiends as a flanking threat to do dominate one side of the board. Now they need to take more of a primary role.
The list:
Plague Priest on Plague Furnace (200)
– General
– Command Trait : Master of Rot and Ruin
– Artifact : Liber Bubonicus
Warlock Bombardier (120)
– Lore of Warpvolt Galvanism : More-more-more Warp Power!
Warlock Engineer (100)
– Lore of Warpvolt Galvanism : More-more-more Warp Power!
UNITS
20 x Clanrats (120)
– Rusty Blade
20 x Clanrats (120)
– Rusty Blade
20 x Clanrats (120)
– Rusty Blade
1 x Ratling Gun (60)
6 x Stormfiends (520)
40 x Plague Monks (280)
– Woe-stave
– 2 x Icon of Pestilence
– 2 x Contagion Banner
– 2 x Doom Gongs
– 2 x Bale Chimes
Warplightning Cannon (180)
Warplightning Cannon (180)
The Tournament
Game 1
Mission: Shifting Objectives GHB
Secondary/Hidden Agenda: Slay
Tertiary: Hold the Primary Point for 2 consecutive turns.
Opponent: Tim F
Opponents list breakdown: Mawtribes: I did not get a chance to take a picture of his list but it was something along the lines of:
Frostlord on Thundertusk, Butcher, Slaughtermaster, Tyrant
Irongust x8, Leadbelchers x10, Gluttons x12
I am probably a little off on this but that’s the general breakdown.
Pre-Game:
I know Tim and was thankful I did not have to play his Gitz today. I was very excited to play his Mawtribes because I have not had a chance to play them since the new Battletome came out. I was not sure how hard they would be to shoot off the table, I was confident I could take out their Heroes, but he big units would be trouble.
Deployment:
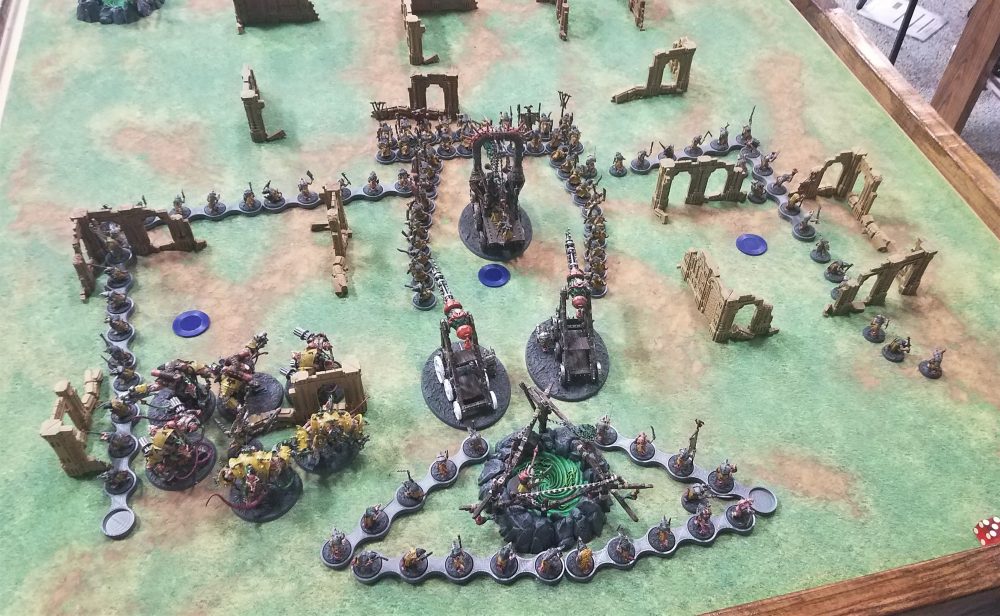
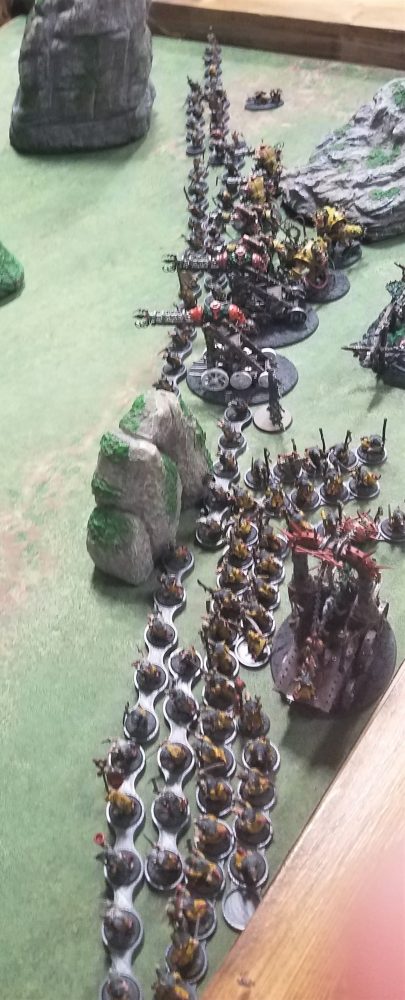
I set up 1 Gnawhole in my backfield and the other 2 were placed in position to threaten the Left and Right objects. 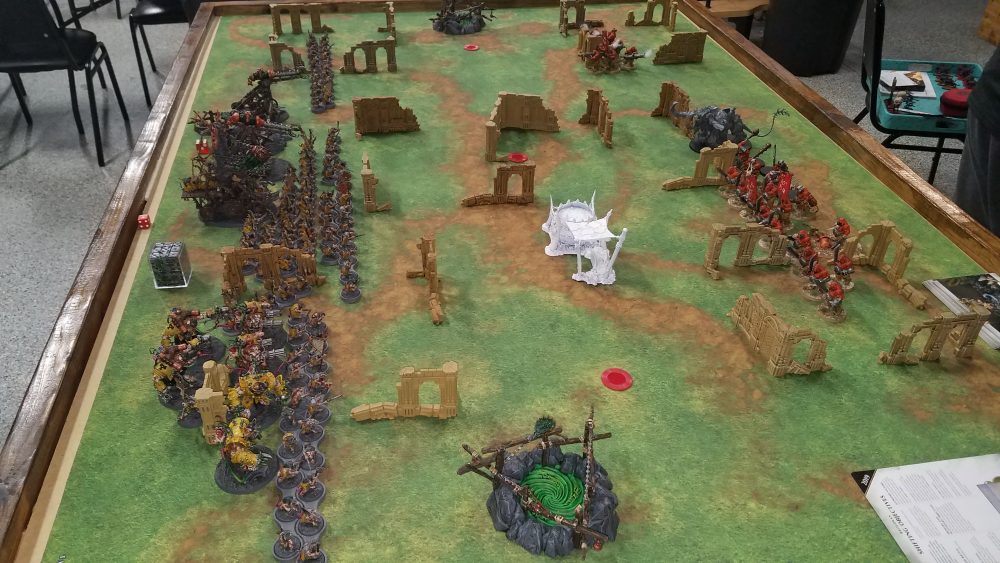
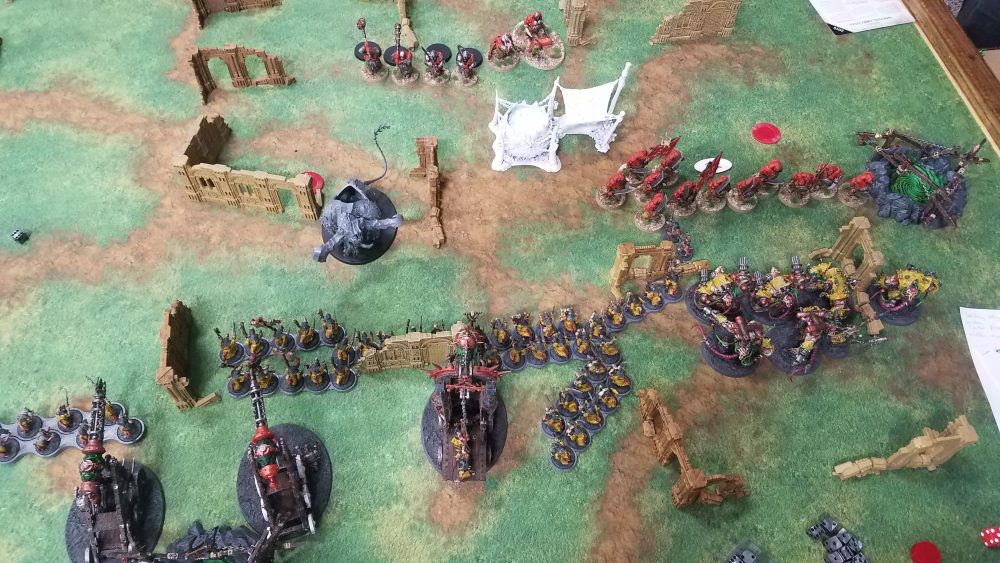
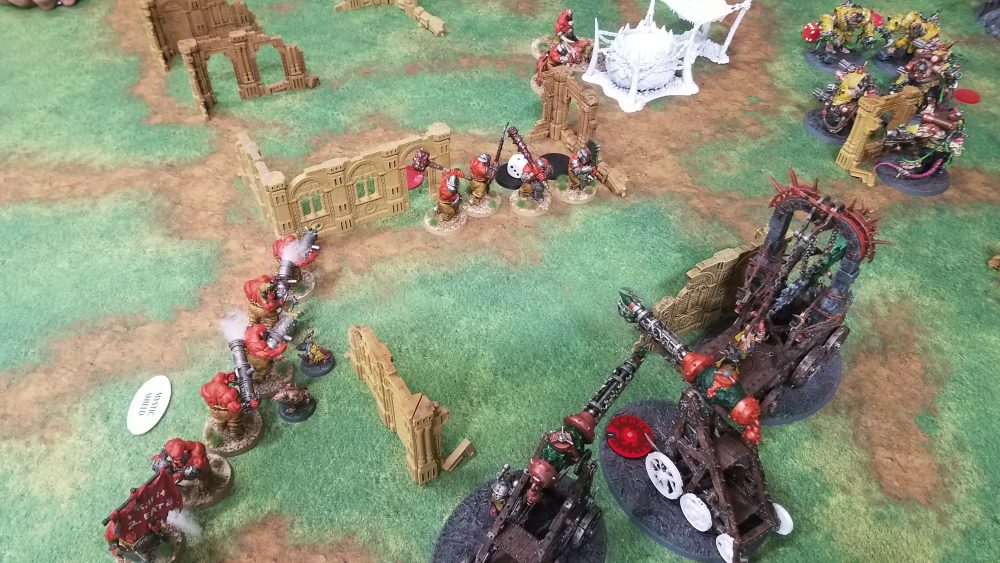
I set up a screen with my Clanrats. The Monks and Furnace were center and the Gnawhole had the Cannons, Ratling gun and an Engineer Left center. The Stormfiends were to the right to counter his large unit of Gluttons. I felt good about deployment. The plan was to take out his Stonehorn fist then use the Cannons to take out his Leadbelchers . I knew I would only get 2 and possibly 3 turns of shooting before my screens were taken down, so I needed to keep that in mind.
Tim set his army up strong to center right. He left his Leadblecher on the far left to take the point and he had one tyrant in reserve.
Turn 1
Primary Objective was the center.
He gave me first turn and I was able to rush all the objectives and max points. I moved up with my Clanrasts on the center and right and sent the Rattling gun through the Gnawhole to take the left objective. He was out of rage of most of my shooting and I was only able to kill a model or 2 with my Windlaunchers. I closed out my turn and gained 5 points.
In Tim’s turn, he moved his army up to take all 3 objectives. He killed my Rattling Gun with the Belchers. and took out my middle screen with his stone horn. The left screen amazingly had 2 or three rats left and because they were now in range of the Furnace they did not have to take battleshock. This would be very important if he double turned me. He wrapped up his turn and gained 5 points.
Turn 2
Primary Objective stayed Center
I luckily won the roll off. My primary Targets where is Gluttons, because they would rip the Stormfiends to shreds if I did not shoot them. I also wanted to kill his Stonehorn to complete my Hidden agenda of Slay, “killing his highest costed model”. I was able to cast More More Warp power on my Fiends and I moved them up into charge range. The Monks surrounded the Stonehorn. I was hopping that I could shoot it off the table, however if that failed The rats would charge. The Monks were now in range of the center point also. Between the Furnace, and the Warpfire Cannons I was able to take out his Stonehorn. The Feinds killed all but 3 Gluttons. This was lucky because I needed 1 alive so I could charge the fiends and take the point back. By the end of the turn I had killed his Gluttons and Stonehorn, and did a bit of damage to his Ironguts. I scored 4 points for objectives. I also completed the secondary and the tertiary objectives.
On his turn he moved up with his Ironguts and killed 40 Monks. Keep in mind that he had about 15 more wounds to hand out, and he did not even need to roll for his bite attacks. Those Guts are just straight gross. I was able to kill a few with the Mortals from the Monks dying. His Leadbelchers killed most of my left unit of Clanrats, after they made a long charge. During this turn he removed the majority of my models from the table. He scored 4 points and after 2 turns we were tied.
Turn 3
The Primary point moved to the left point.
I once again won the roll off, I needed that, If iI would have failed this game would have been over. His Ironguts would have smashed through my Stormfiends no problem.
“I just miss the killing power of the monks. I think that replacing them with 2 units of 20 clan rats may be the best bet. In this list I just need more speed bumps. I need to slow people down so my shooting can shoot”
With my shooting I took out the Iron guts and most of the Leadbelchers. Also the one Goblin hero he had holding the Left point, “not pictured or talked about up to this point”. The one problem I had was that I was in no position to take back the center or left point. So I had cleaned up most of the board but only scored 1 point.
Tim’s turn. He rolled in with this Leadbelchers and killed a cannon. The Tyrant poped up and made a long charge roll to kill the last Clanrat holding the Right objective. This was a nice turn for him, he scored 5 points.
Turn 4
My turn I was able to take control of all 3 objectives and get him down to 1 remaining model. His butcher in turn killed most of my unit of Stormfiends. When it was all said and done I think there was a total of 8 models remaining on the table. It was a close hard fought game with a couple of big swings and important initiative rolls.
So I maxed points and moved on to the next round.
AAR
I think my plan was ok in general, but I had never played the Mawtribes and was a little overly confident I could shoot them off the board. However the game was much closer than I anticipated. If he would have won the turn 2 initiative roll I would have been tabled. One of the biggest mistakes I made was not pulling my left screen of rats back just a bit. I think it would have given me another turn of screening on that side. In the end it cost me a cannon. Tim admitted his big mistake was underestimating the killing potential of the Stormfiends. He also said that he should have charged them with his Ironguts on turn 2. I agree, it would have been a bit harder of a charge, but if he got lucky with it, they would have probably been taken off the table.
My big take away from the game is to kill the Ironguts first, and that with this list I need more speed bumps. The Monks do not have the staying power to take a hit.
Game 2
Mission: Better part of Valor
Secondary/Hidden Agenda: Seize
Tertiary: Hold more objectives in the enemy territory then them
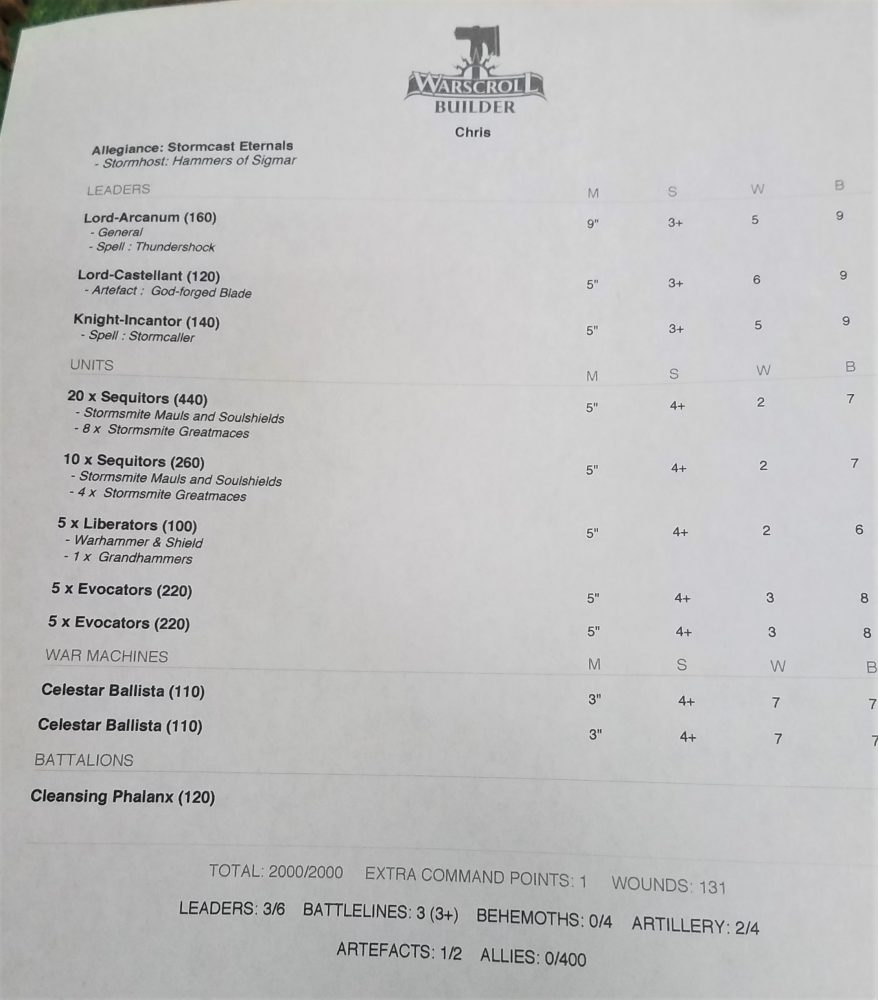
Opponent: Chris S
Opponents list breakdown:
Pre-Game:
I have never lost to Stormcast. So I was relatively confident I could handle them. This list was not shooting heavy so that was a positive. However the mission did not favor me. There is a lot of board to cover and with all the deepstriking I would have to cover a lot of ground. I knew that the only real way for me to take any of his points was using the Gnawholes. “It would be great to have skitterleap in the list”. in the past I have faced the Hammers of Sigmar them coming back has never been a big issue……
Deployment:
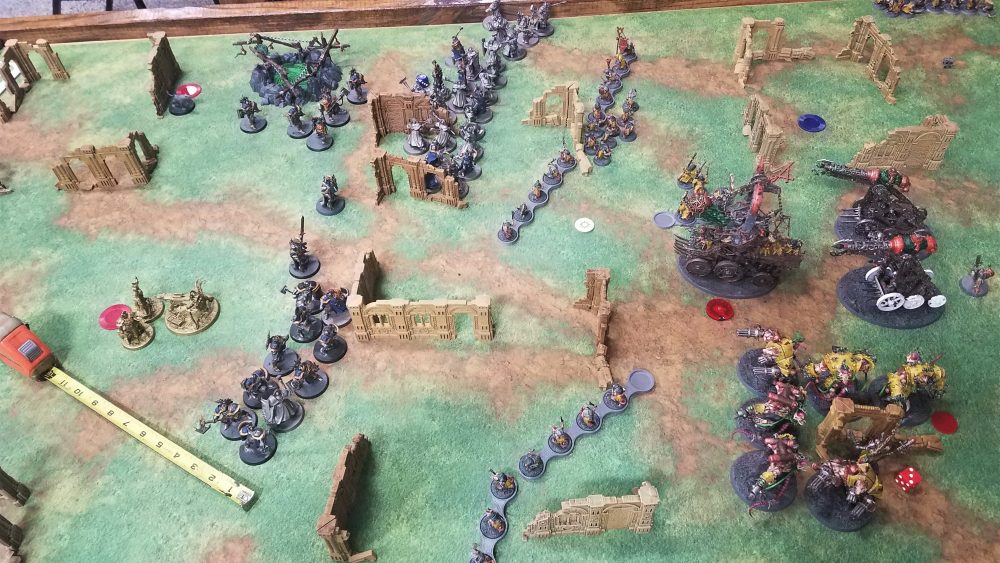
First order of business was to block all my deployment area from him. I did not want him dropping behind my lines and making a mess of things. I put several units within range of the Gnawhole in my territory. I wanted the options if I had the opportunity to send anything through them. Chris set up on the edge of his zone and kept: a Ballista, 20 Sequitors, Knight Incantor, and 5 Evocators in the sky. I put my unit of Fiends to my left side and far back “I was worried about shooting. a mistake”. Once again I learned that they need to be center. I just need to stack them in the middle to give them more threat range.
Turn 1
He gave me first turn I did nothing but give an extra attack to my Monks
His turn he started frying me with Stormcaller and Storm Scroll. My backfield was taking wounds. He then moved up his units.
Turn 2
Bottom line is he continued to hurt me with Stormcaller. He moved up and dropped all his units onto my right flank. My Stormfiends were way out of position. He made the charge with his 10 man unit of Sequitors and they started killing my monks. I was able to do very little damage back to them. Chris was tightening the noose.
I was able to shoot and kill one of his ballistas, and take out his 10 man Sequitors. However he rolled a 5 and brought them right back. that put me in a very bad spot!
Turn 3 and beyond
At this point I needed to Kill off the 5 Liberators holding his Left objective. It was the only way I was going to get in position to send my Clanrats through the hole. I had a good shot of doing that with my windlauchers, but him bringing back the 10 Squitors and then moving them to the left flank ended that plan.
He closed in with his 20 strong unit of Squitors and killed most of the Clanrats on my Right. He had also made the charge with the Evocators, but I started removing the casualties from that side of the unit so they did not get to swing. He also charged my left Clanrats with his 10 Sequitors. I was in a bad position. I knew there was 0 chance of me killing that 20 man unit.
Because I freed up the Evocators I had to shoot them off the board or they would walk over to the Right objective his next turn. I managed to kill them and BAM rolls a 5 to bring them back. “As I was looking at the rules for the Hammers, I did not see were Evocators can be brought back using the command point. I do not think they are a “Redeemer” unit. I could be wrong, but I think this rule was misplayed, correct me if I am wrong”. With him bringing the unit back he would have been able to set it up on either my Right or left objective and effectively win the game. I conceded at that point.
I came away with 0 points total and Chris maxed his points for the game.
AAR
I really misgauged the Tankieness of the Stormcast this game. I made a few deployment errors, like offsetting my Stormfiends and putting my cannons so far back. As far as what I did during the game I think I played it mostly correctly. I could have tried to push my Fiends farther up the board to try and shoot him off his Left objective, but there was guarantee of that even happening if I got in range.
This was a good test for the list. Between this and my other playtests, armies with large units of good armor give me trouble. The Monks used to cover this base a good bit with their volume of attacks. I have also found that this list does not like units coming back from the dead, now I know how all those people that played my Death army feel.
Game 3
Mission: Places of Arcane Power
Secondary/Hidden Agenda: Center Ground
Tertiary: Kill a Hero with a Hero
Opponent: Dillon C
Opponents list breakdown:

Pre-Game:
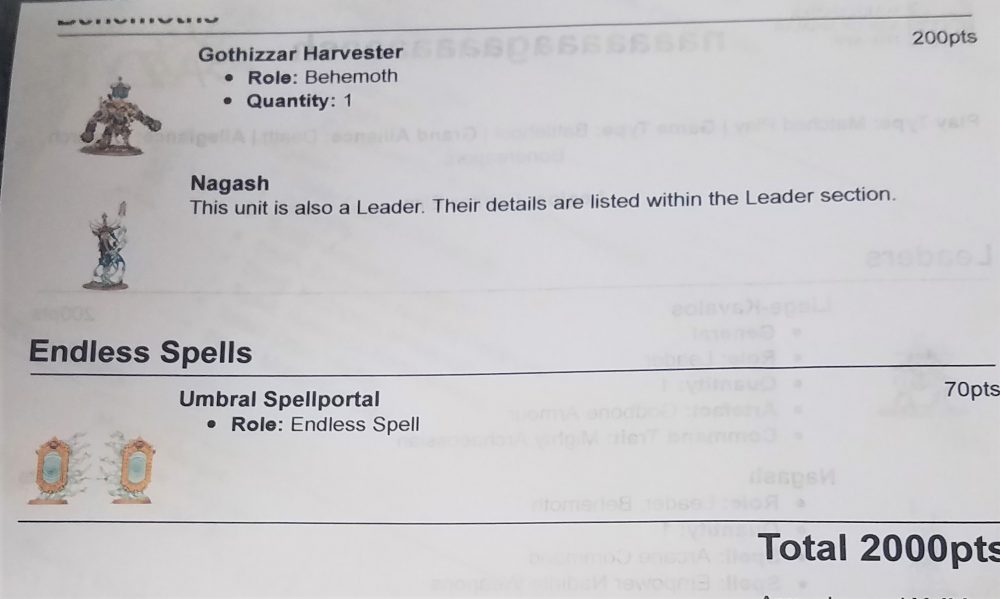
I was not looking forward to this game. I have played about 6 games against Bonereapers with my Skaven and the results are not good. However I was excited to see how Nagash did.
Also the mission was a concern because I do not have a front line Hero to go up and sit on objectives. On the other hand he only had 2 total Heroes so I had an advantage there.
The Petrifex Elite are so tough, I would love to build and play test them, but I think as soon as I get them on the table GW will nerf them.
At this point of the tournament I was out of the running to win so I felt like going balls to the wall and just making it my goal to kill Nagash!
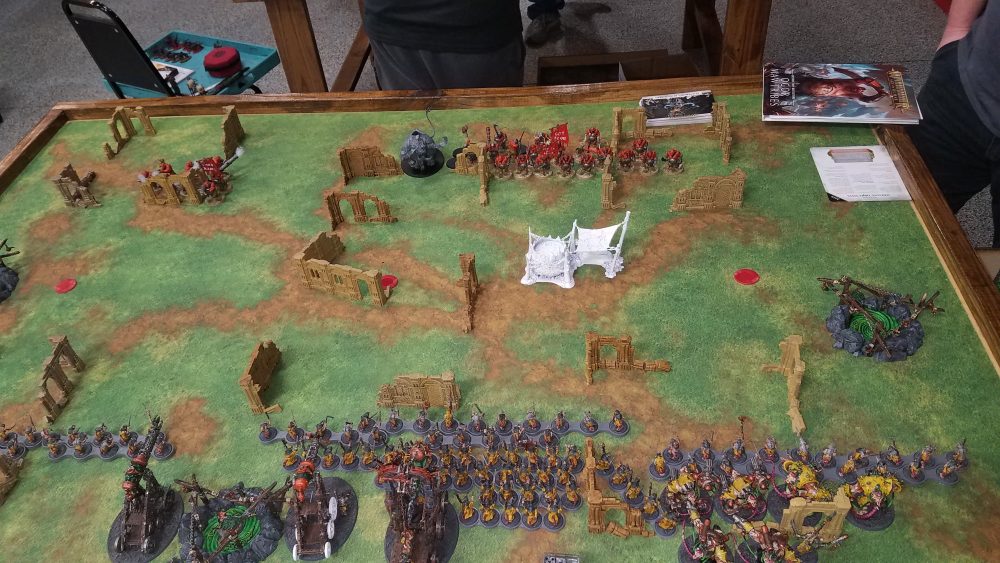
Deployment:
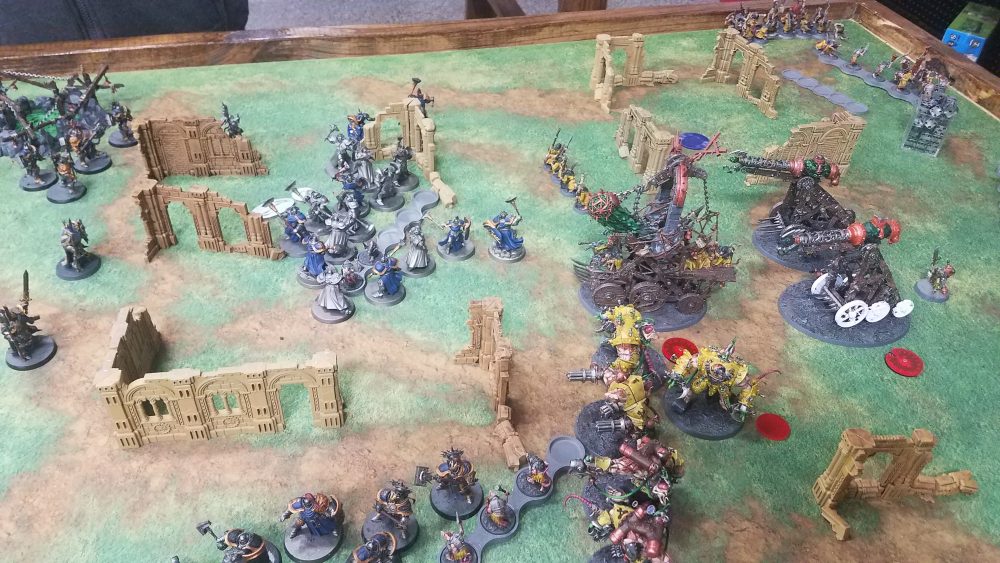
The Gnawholes were set up to give me access to the Objective in the corners.
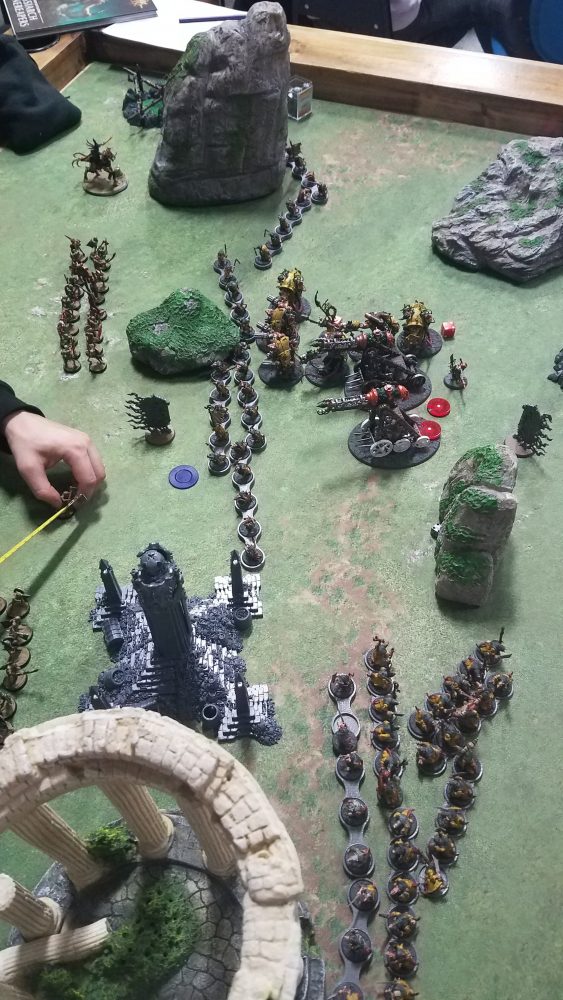
I set up with a strong center with a screen, Fiends and Cannons. I had everything set up that I could move within shooting range of Nagash if he gave me first turn. I stacked my left side with Monks and the Furnace. The right I just put a unit of Clanrats and a Rattling gun. Building my line around the Stormfiends was the best move I made all day. I am a fool that I had not been doing it for weeks. I think the issue was that I had just played with 80 Monks in the center so much I was used to them being the primary threat.
He set up Nagash center and his Kavalos to my right. He had a strong center and weak flanks.
Turn 1
He took first turn. For once I was fine with taking first or second turn, I was in position ether way to shoot and if he took first he was out of position to do much. He moved up and took the center point with Nagash. He took the Right with Kavalos. The rest of his army ran forward. He was able to cast the portal but was not in a position to use it. The most important spell he cast was Protection of Nagash. He would finish the turn with 2 points.
My turn 1 I could not dispel his portal and I was not able to cast any other spells. I ran my left flank to get into position to take the point on turn 2. My right flank held and my middle shuffled up to get Nagash into shooting range. After shooing Nagash with both an overcharged Warpfire cannon, another Warpfire cannon, 2 wind launchers. I took off 6 wounds. Not great but not bad. However I did get a few mortal wounds through with the cannons and that caused his Proteciton of Nagash spell to activate. He just moved him back a few inches, but it pulled him off the point. “I was reading up on the spell, and it said it how is unbound, I cannot remember if he still used it the following turn. no big deal eather way, but good to know.” The turn went ok for me nothing great I scored 0 points.
Turn 2
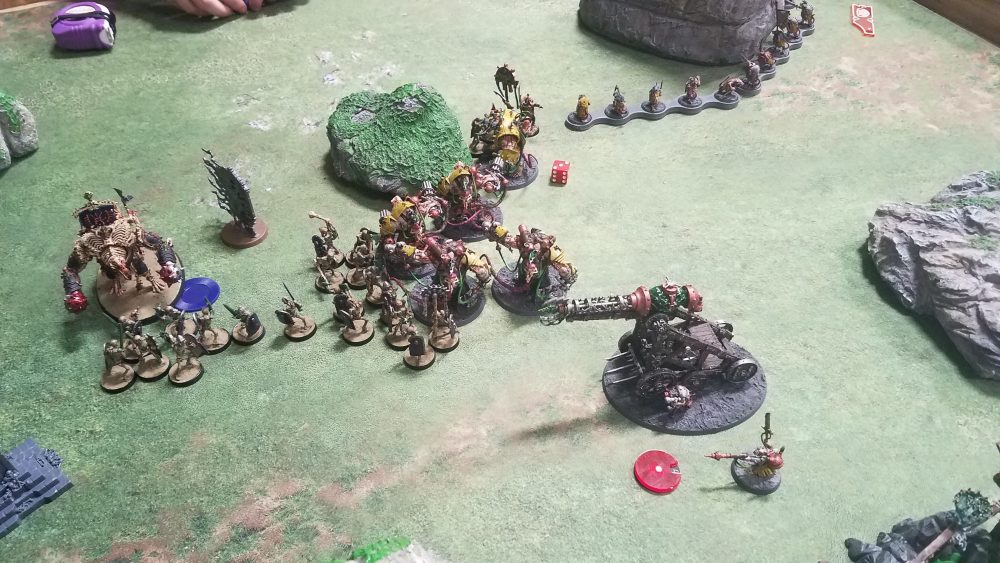
I got the double turn. This put me in great position to take out Big Daddy. I was still not able to dispel the portal and once again I was not able to cast More More. I put a few wounds on his left left unit of Guard with the Furnace and that was all for the Hero phase. Next I was able to move my Stormfiends into 12 inch range and fire with everything, I also fired the cannons at him. I took out the big guy! At this point I was feeling really good about the game. All I needed to do with kill Kavalos and it would be in the bag. I scored 1.
His turn he moved up with his Guard and Harvester in the center. He failed his charge with his Harvester but his unit of 20 guard made it into combat with my line. The most important thing he did was make a big charge rolls that allowed him to lock in my Stormfiends. This in the end would win him the game. He scored 2 points for a total of 3.
Turn 3
I kept first turn and had to shoot the one of the two units of guard locking my Fiends down. I chose to poor the shots into the one on my right so I could free up the Clanrats they had lock up also. He made lots of saves and I rolled a bit low on the their shooting. 3 Guard remained alive. Both Cannons targeted Kavalos with one overcharging. Then I rolled a 4 and 6 for the power numbers. I only took off 4 wounds! My turn was not an utter disaster, but it could have been much better. I scored 2 total of 3.
On his turn he took out my center unit of Clanrats with his guard. The Harvister failed another short charge. It was a quick turn on his side. He scored 3 for a total of 4.
Turn 4 and 5
I am not sure the turn order for these round, It was all a blur at this point, and his turns were so short. It did not go great for me. I used all my shooting to try and take out his center unit of Guard. I hit and wounded ok, but he made sooo many saves and at one point he brought back like 5 or 6 guard from the Harvester. I once again overcharged my remaining cannon to finish off Kavalos, I could still win the game! I rolled a power number of 3 and got him down to 1 wound. It was up to the rattling Gun! I took off the limiter and rolled 2 2s, yeah it was gone with no wounds going through. On his turn he took out about half my Stormfiends.
It came down to me being able to shoot his Kavalos off the board. I did not and there was no way for me to catch up.
Final score JTJ=10 Dillon =11
Both of us took center ground for the Hidden Agenda and both failed it. Neither of us completed the tertiary
AAR
The rolling in this game was a bit up and down. The mistake that cost me the game was getting my Stormfiends caught in the combat with his guard, however I needed to move them way up to kill of Nagash. If I would have managed my screen better that would have not happened.
I think Dillon played it nicely. It could be argued that he should have made me go first.
I just need to use my screens better and not roll so many Power Number 6s for my Cannons.
I liked having all my guns center it gave me great board presence.
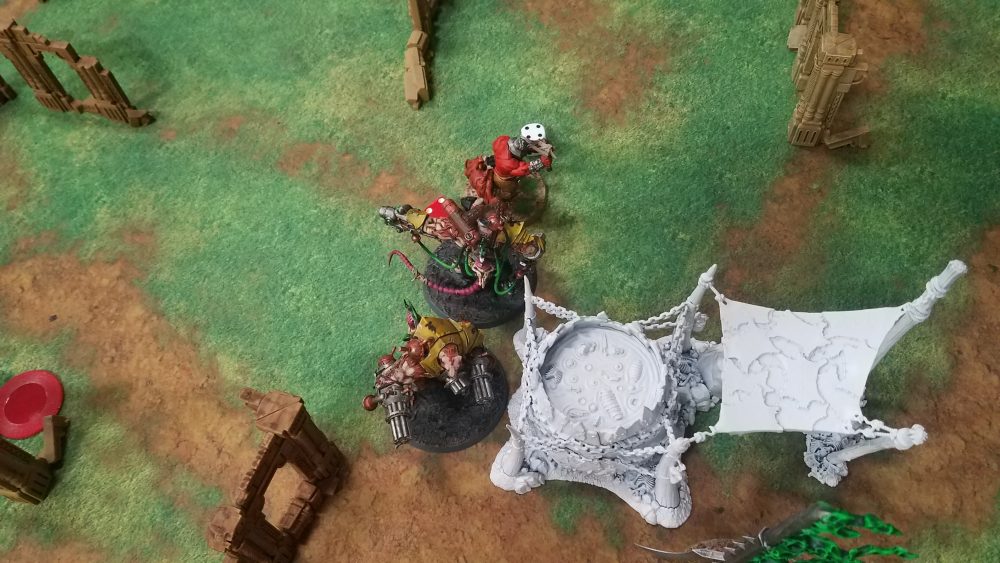
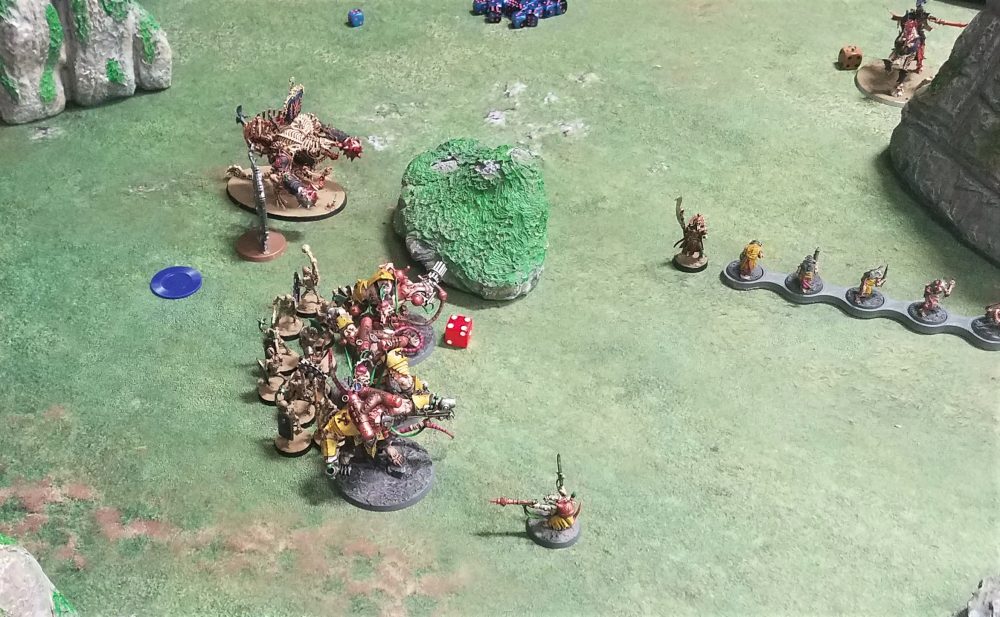
MVP of the Game, the unkillable Kavalos: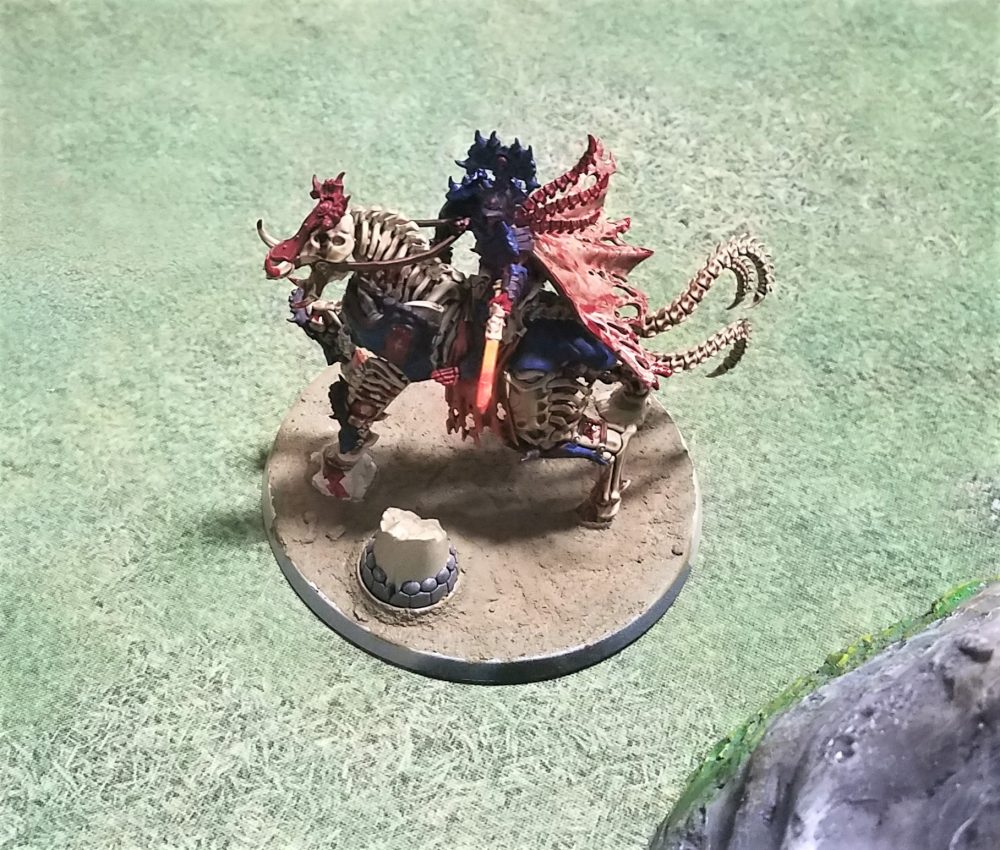
End
It was a fun day and this was the first tournament for the year. It could have gone better for me, however I learned a lot. All the matches were challenging and fun. I am still learning how to use the list, screening and deployment are the biggest things I need to work on. “Build around the Fiends – Monks on the flank”
Thanks for reading.